Minus Tide Explorations & Eagle Viewing on Oregon’s Central Coast

Trip Report:
Group Leader: Mark Hougardy | Organization: Eugene-based hiking group | Date: mid-June 2022 | Duration: 3 days | Hiking Distance: 7 miles | Participants: 8 | Type: Hiking & Tent Camping

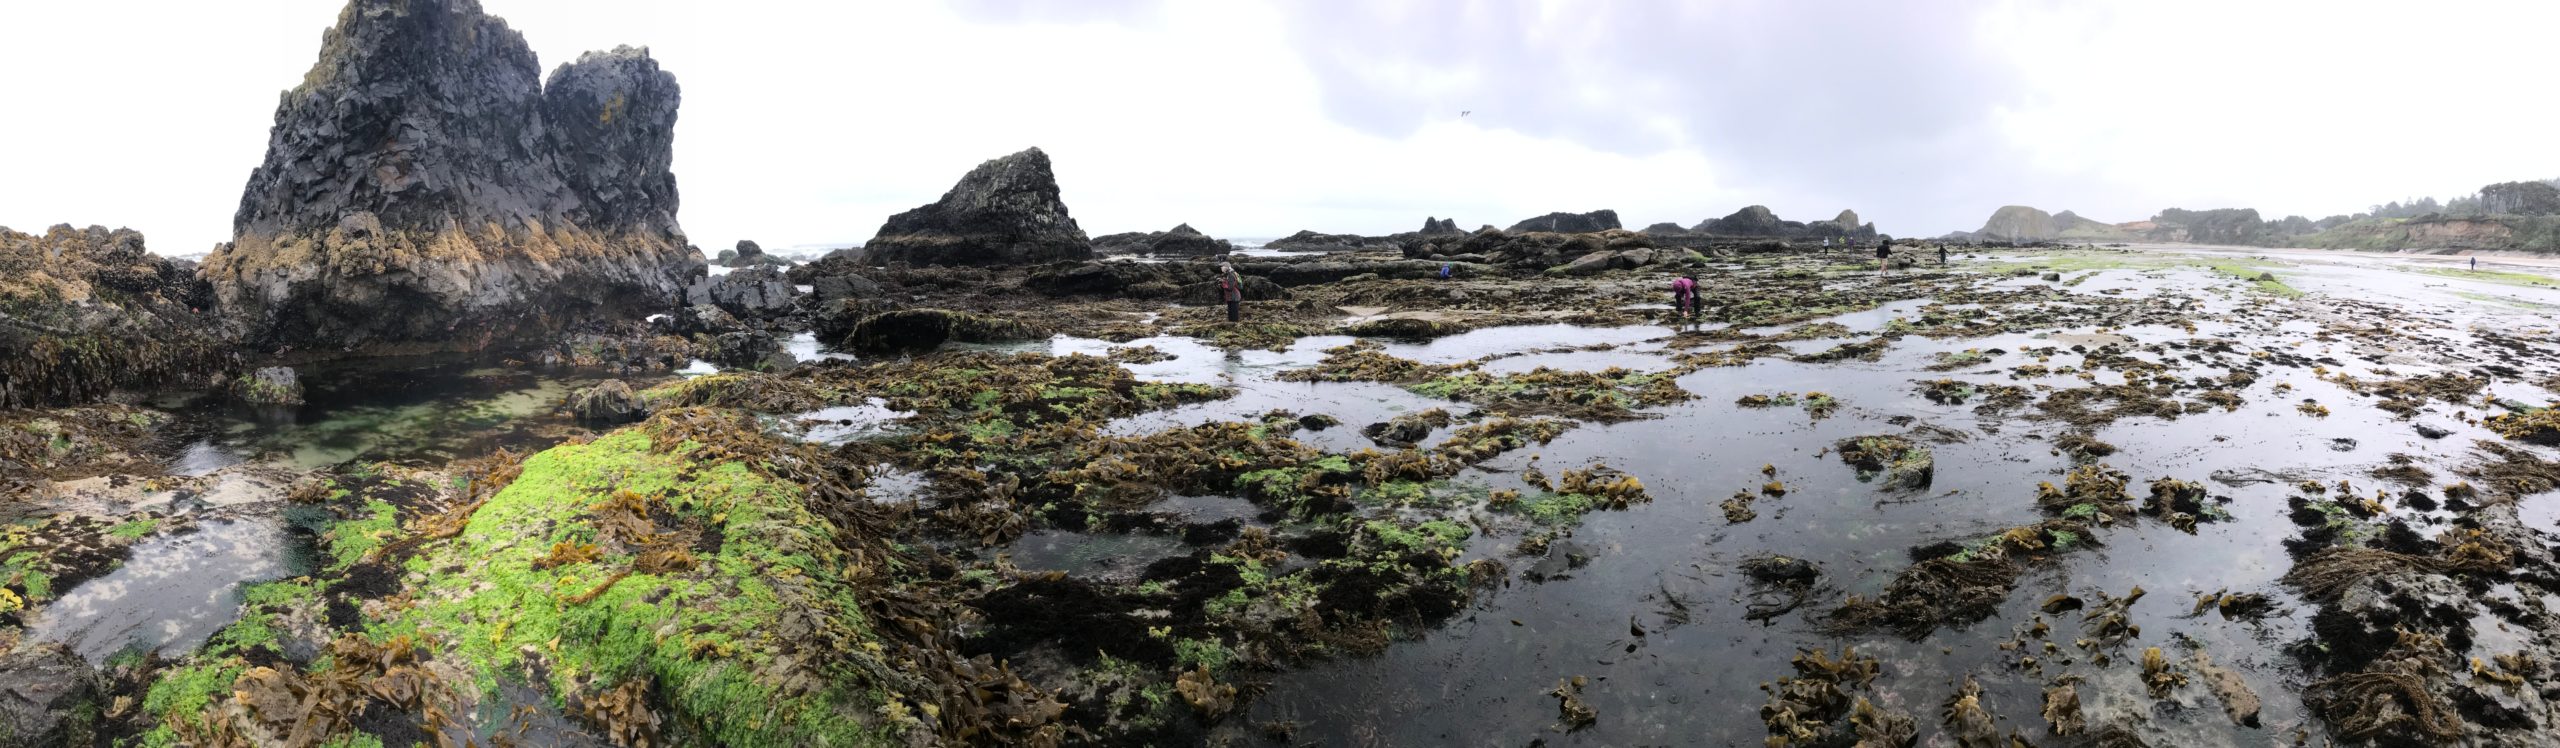
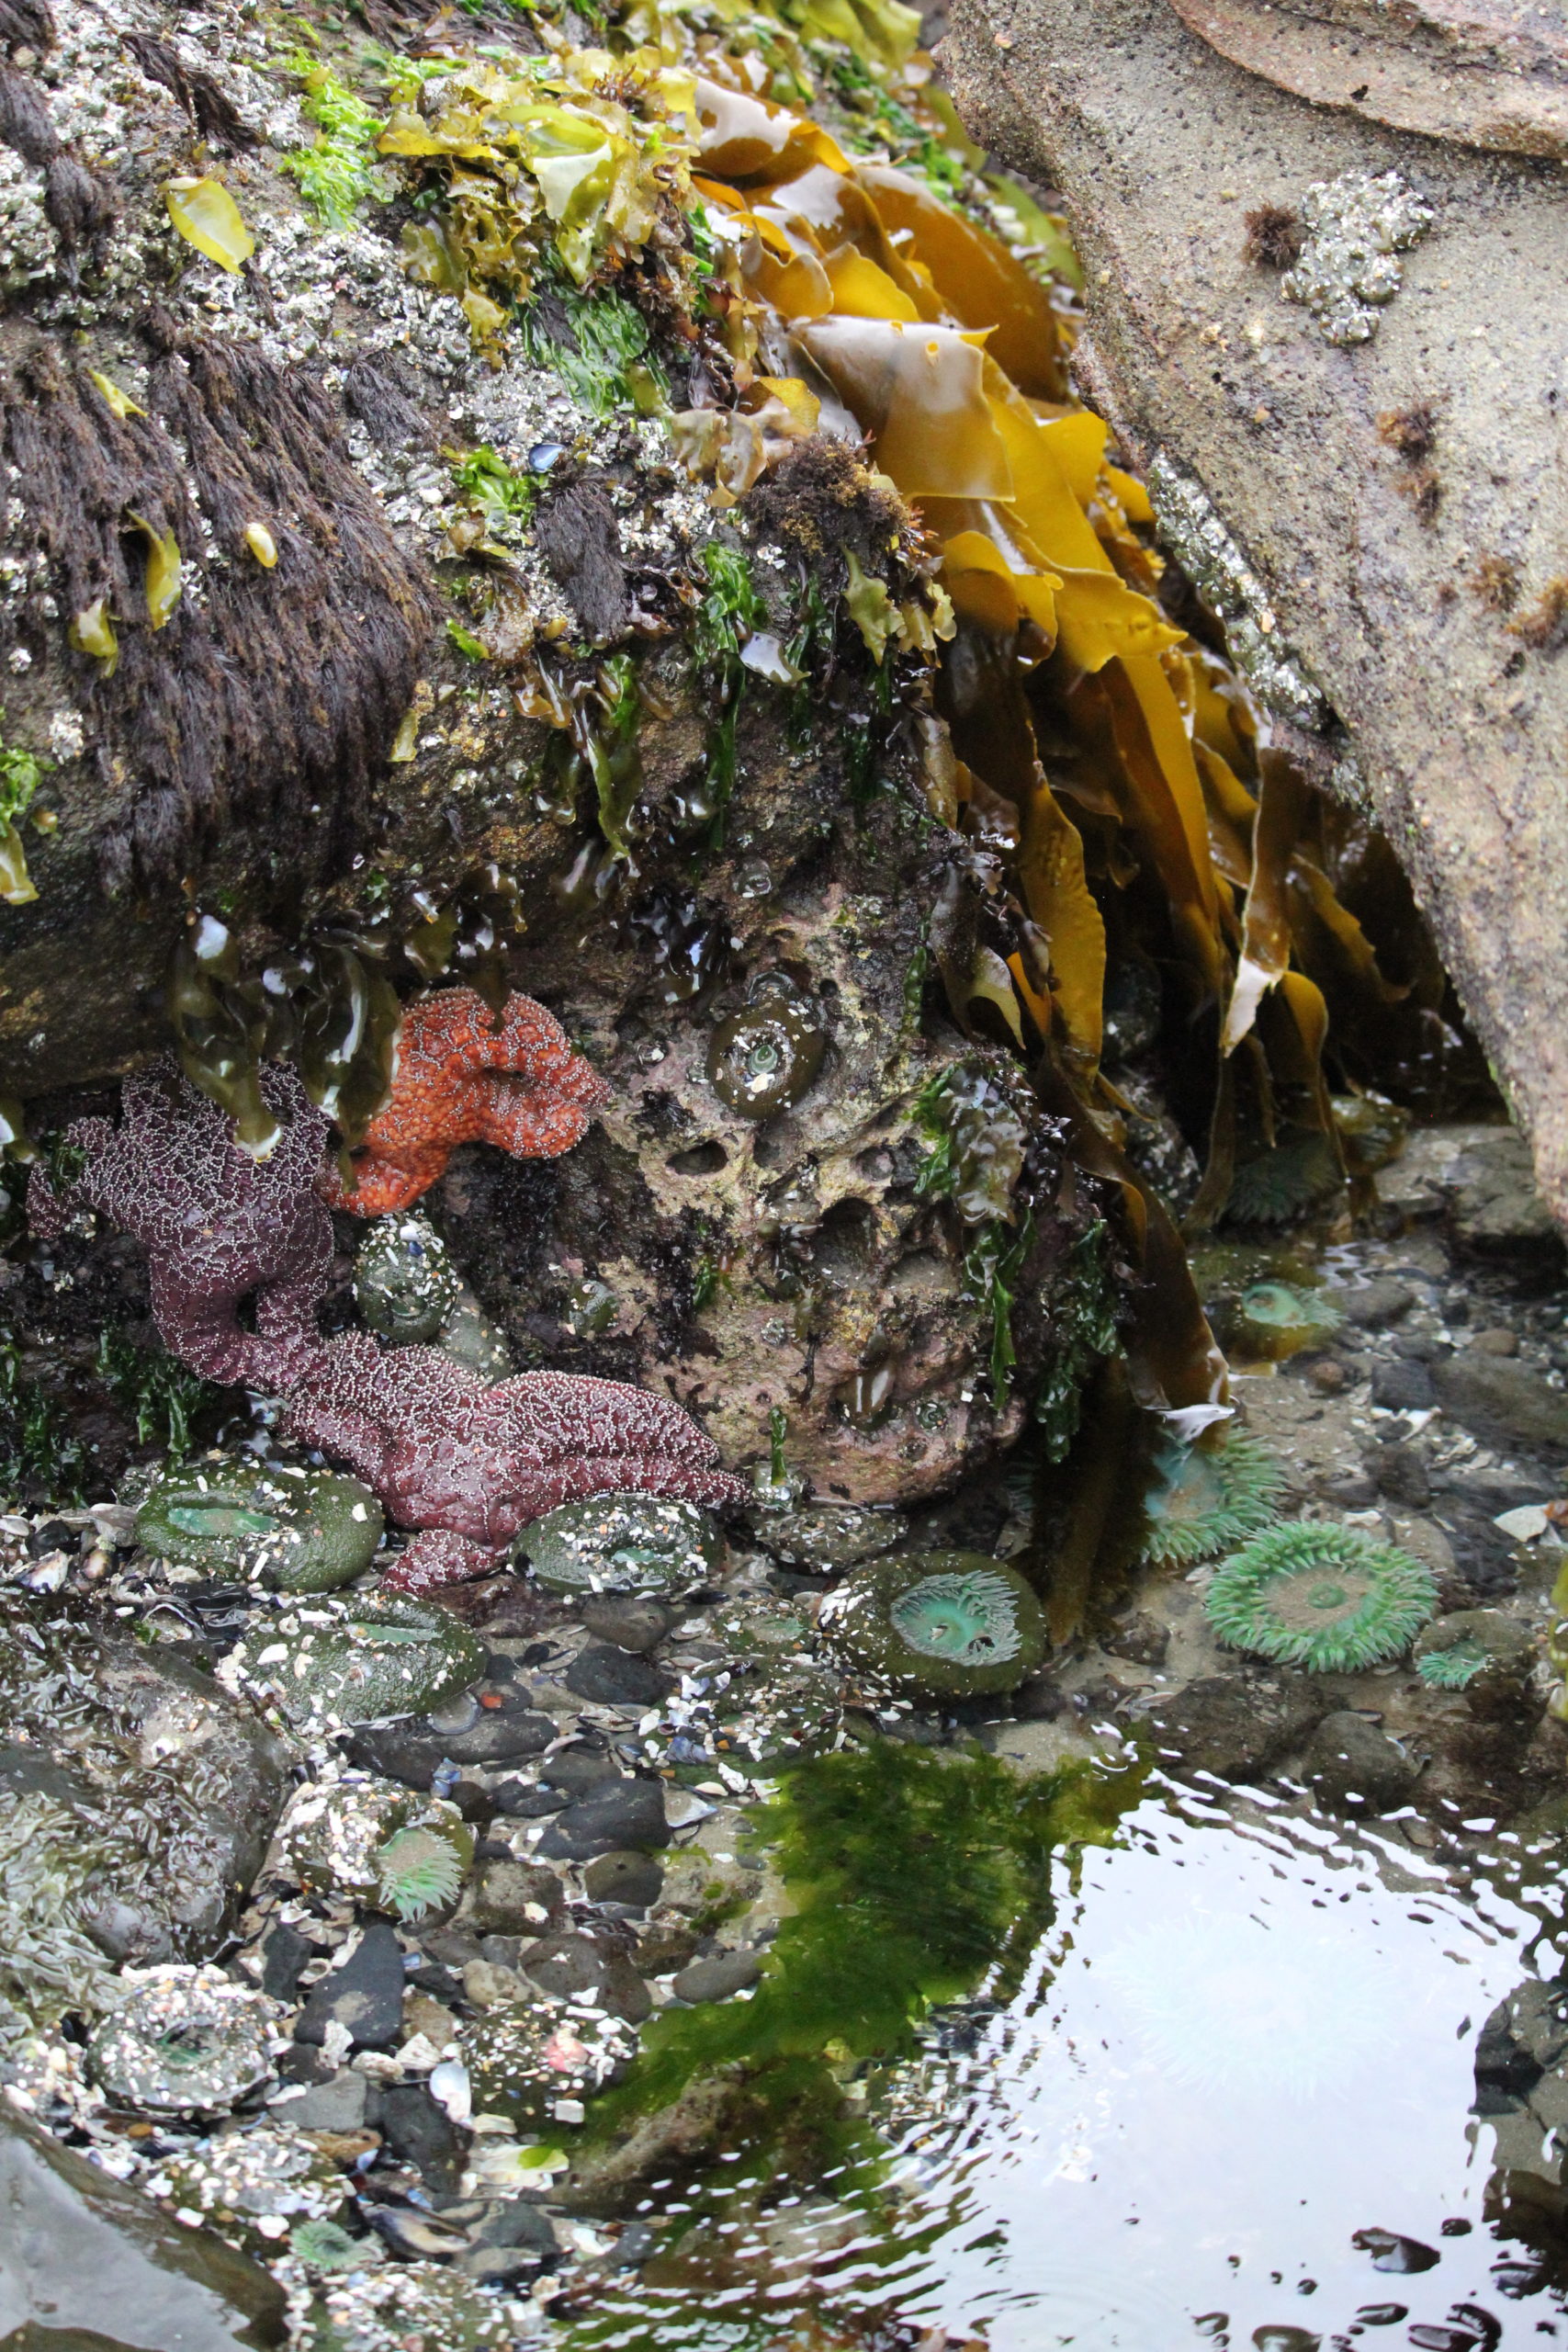
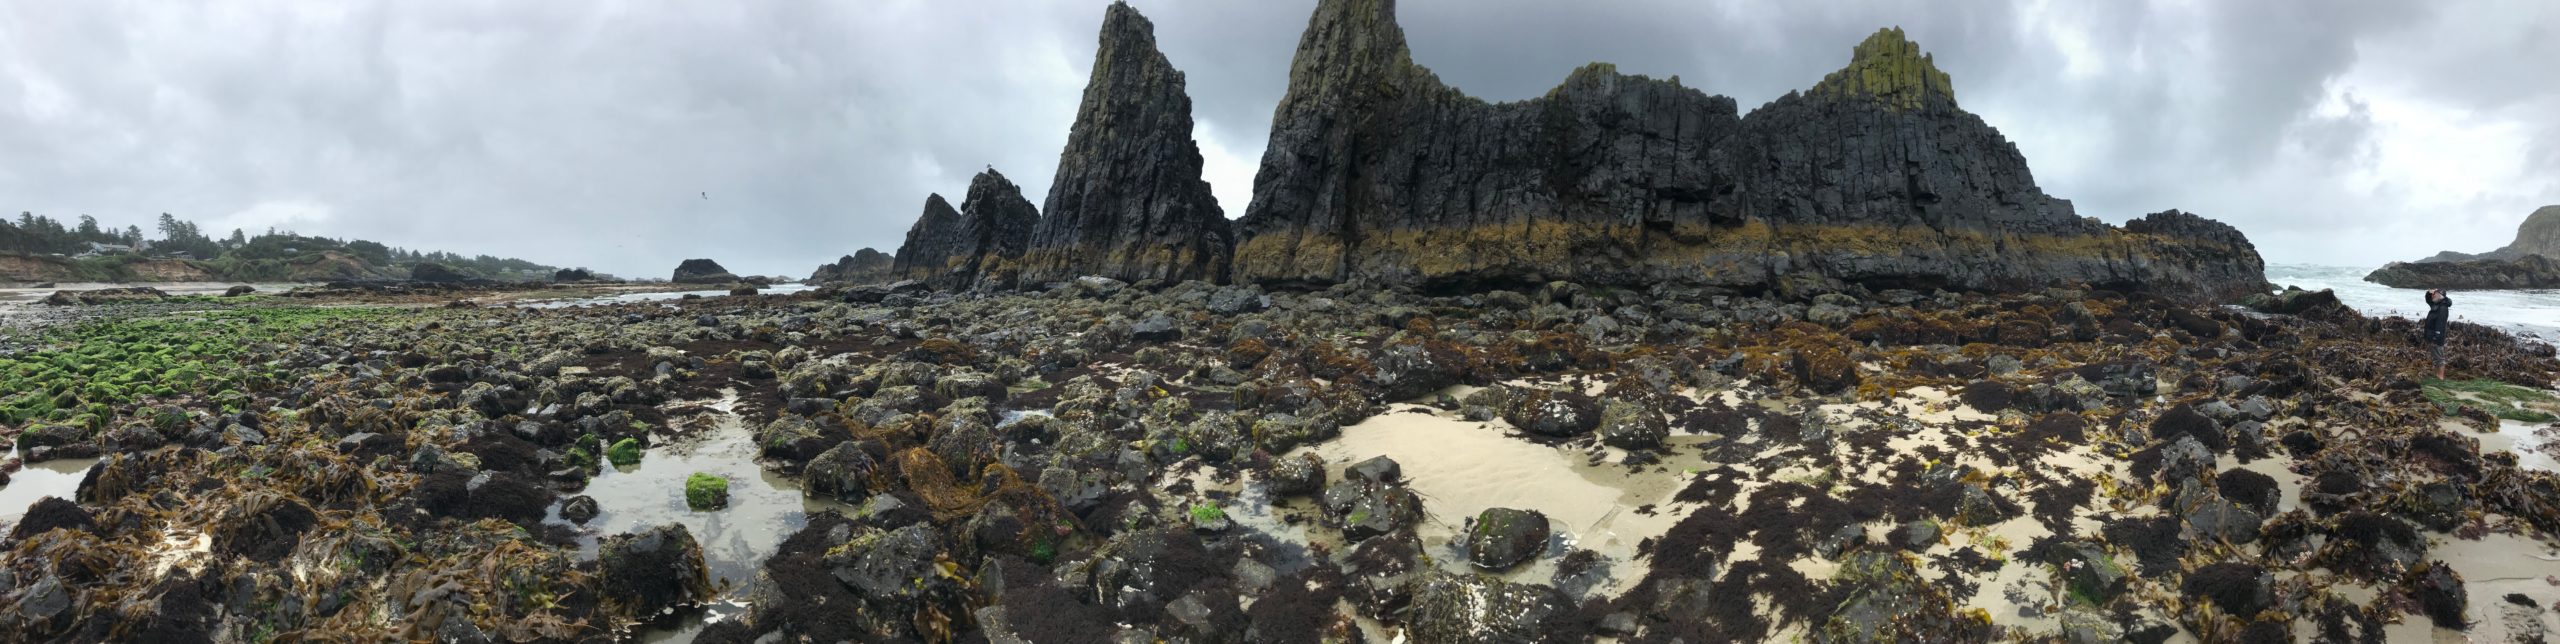
The low tide zone is always covered, except for a few times a year during the lowest tides. It was during one such minus low tide that 8 of us ventured to an area along Oregon’s central coast to explore tide pools during an impressive -2.4 feet (-73 cm) low tide!

Day 1: Our group arrived on their schedule at one of the nearby Oregon State Park group camps. That afternoon and evening were open for beach walking, exploring on your own, or watching the sunset. In the evening, everyone enjoyed a campfire and discussed plans for the next day. It was interesting that one topic of conversation that arose was the book, “Braiding Sweetgrass.” Of the 8 participants, more than half had read the book, one was in the process of reading, and the others were interested. At 10 pm a gentle rain started and continued through to the morning.

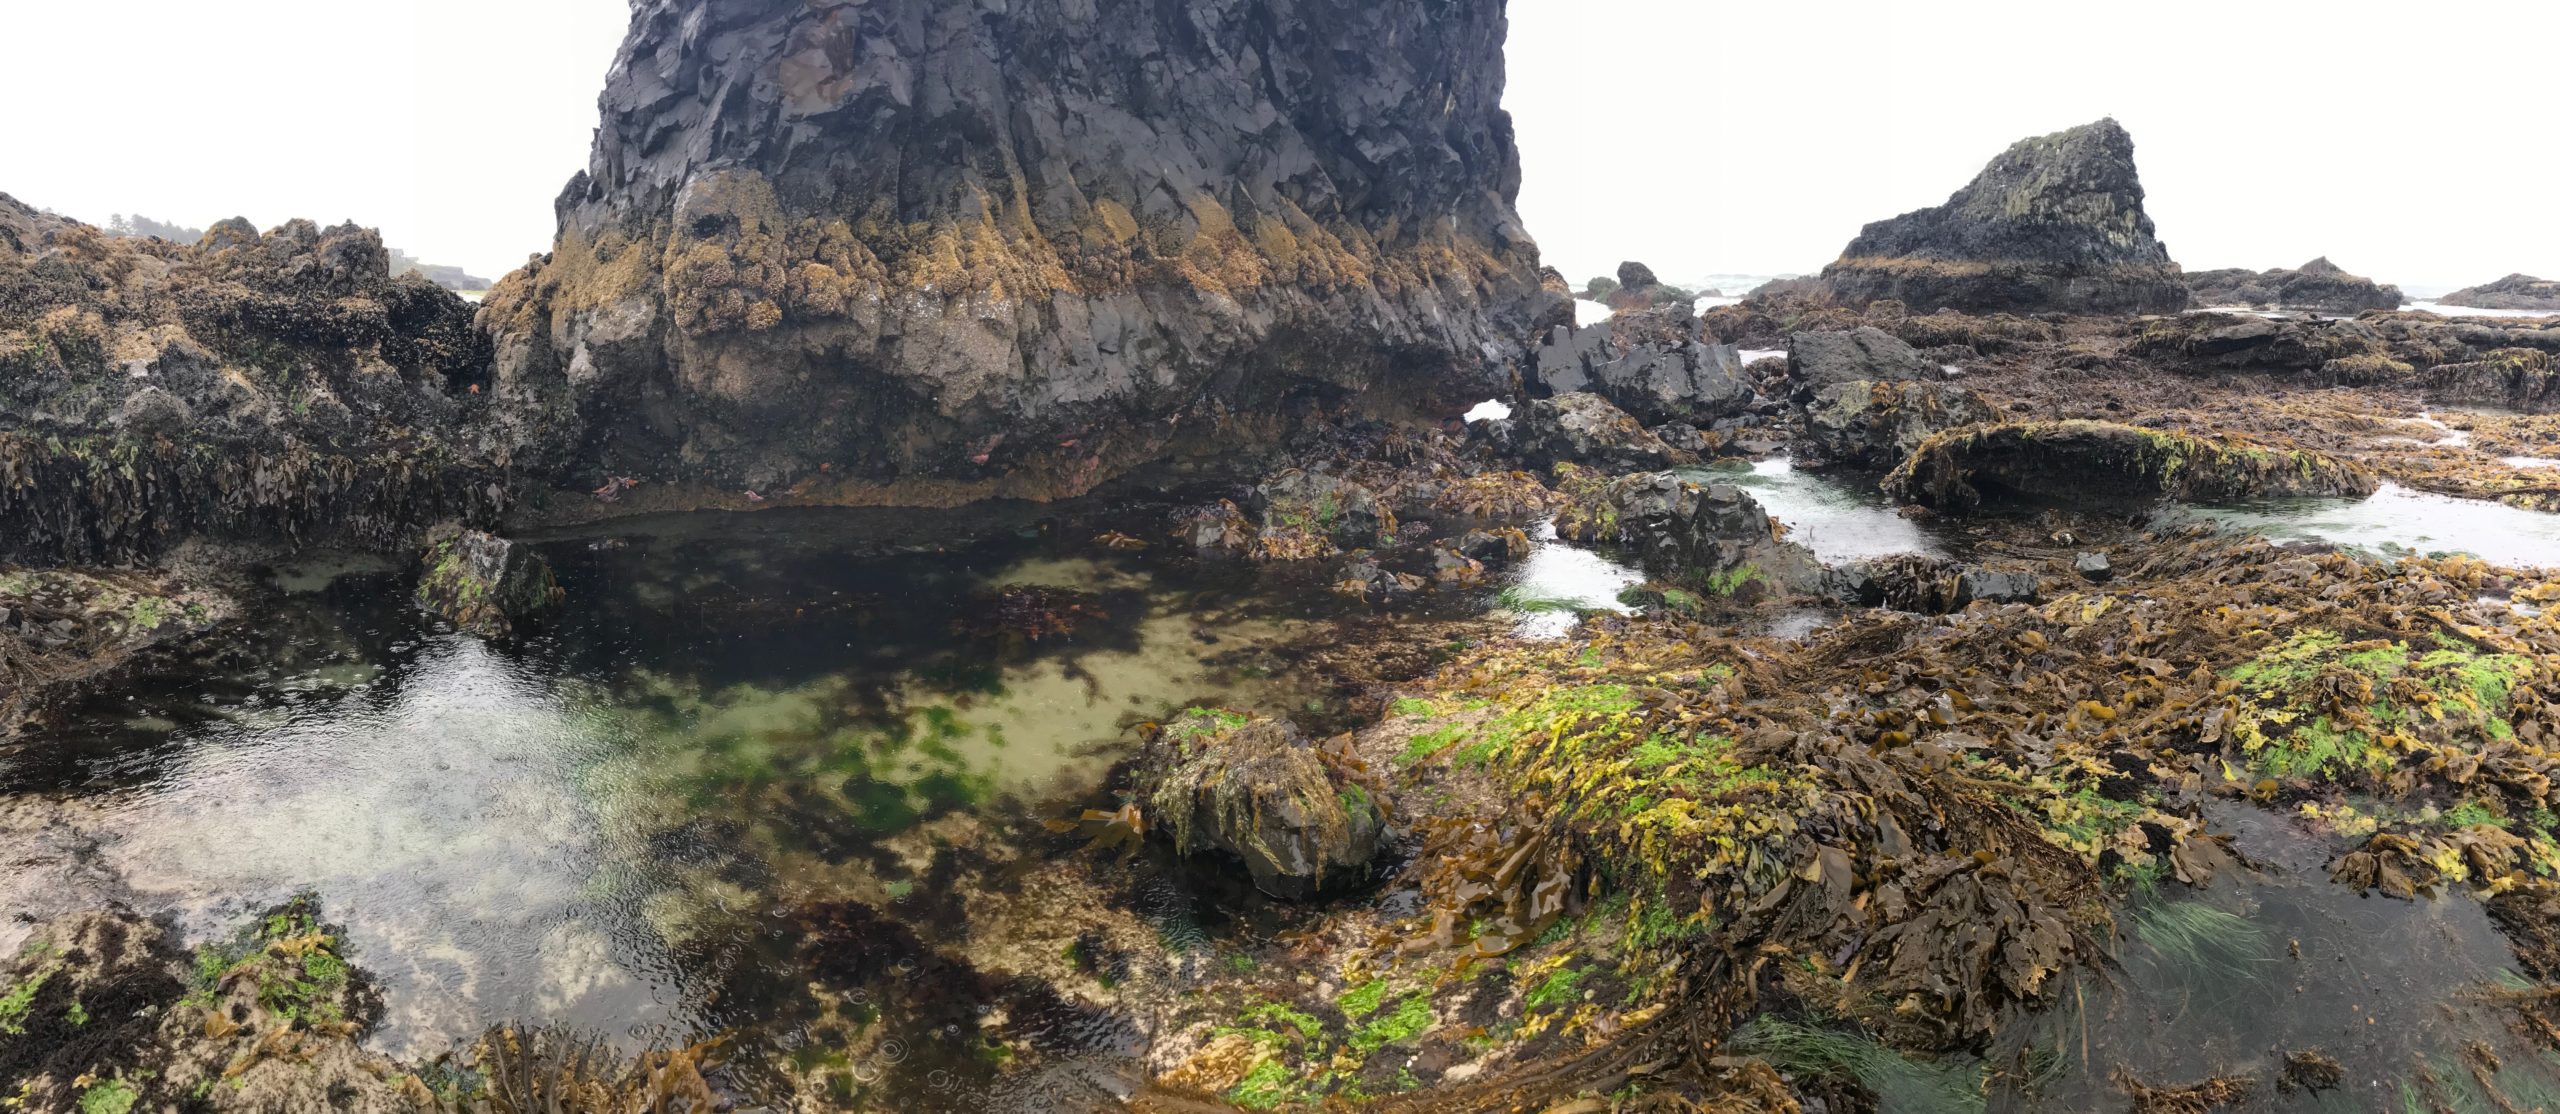
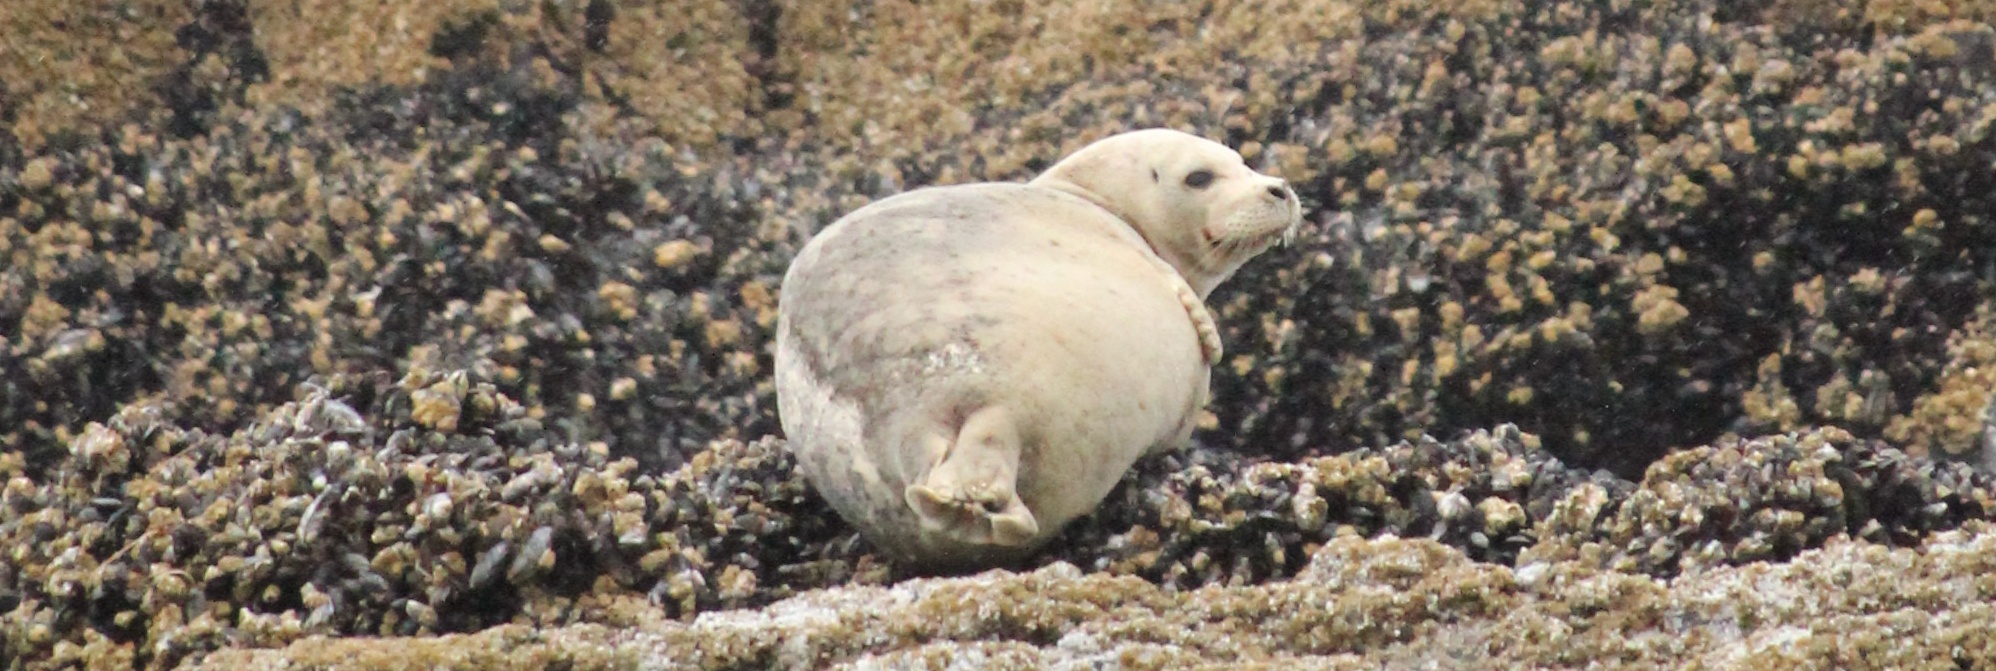
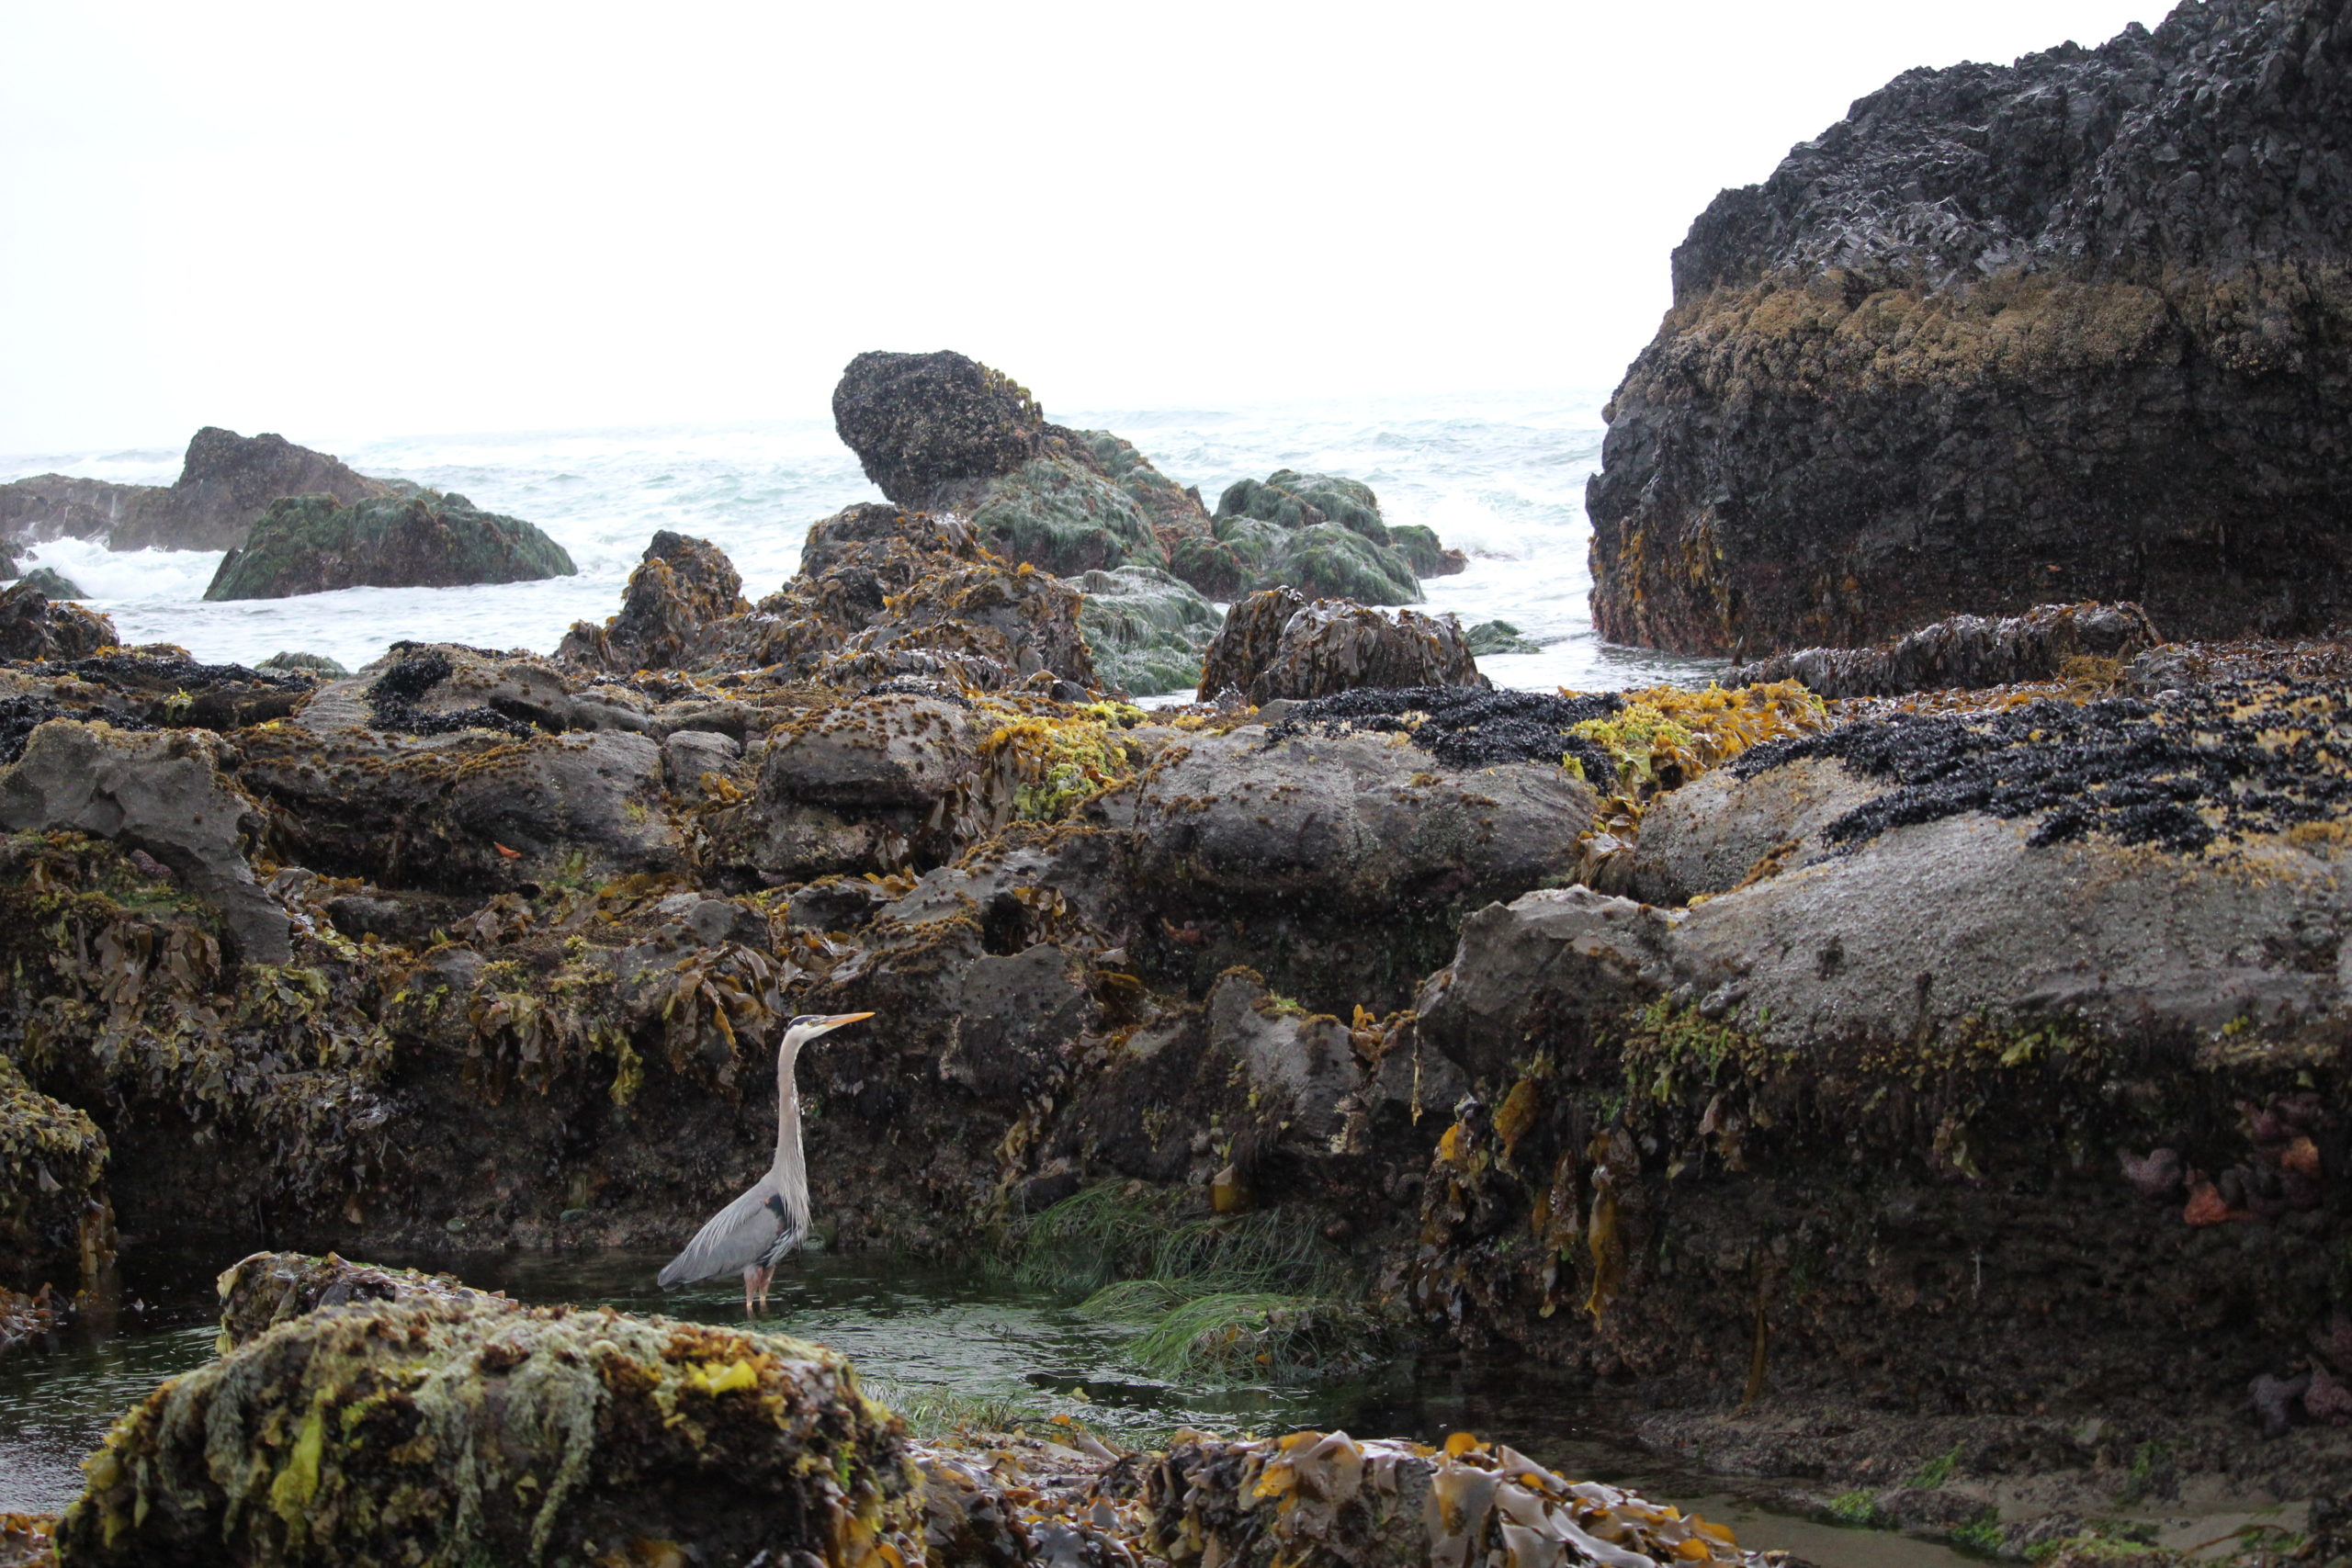
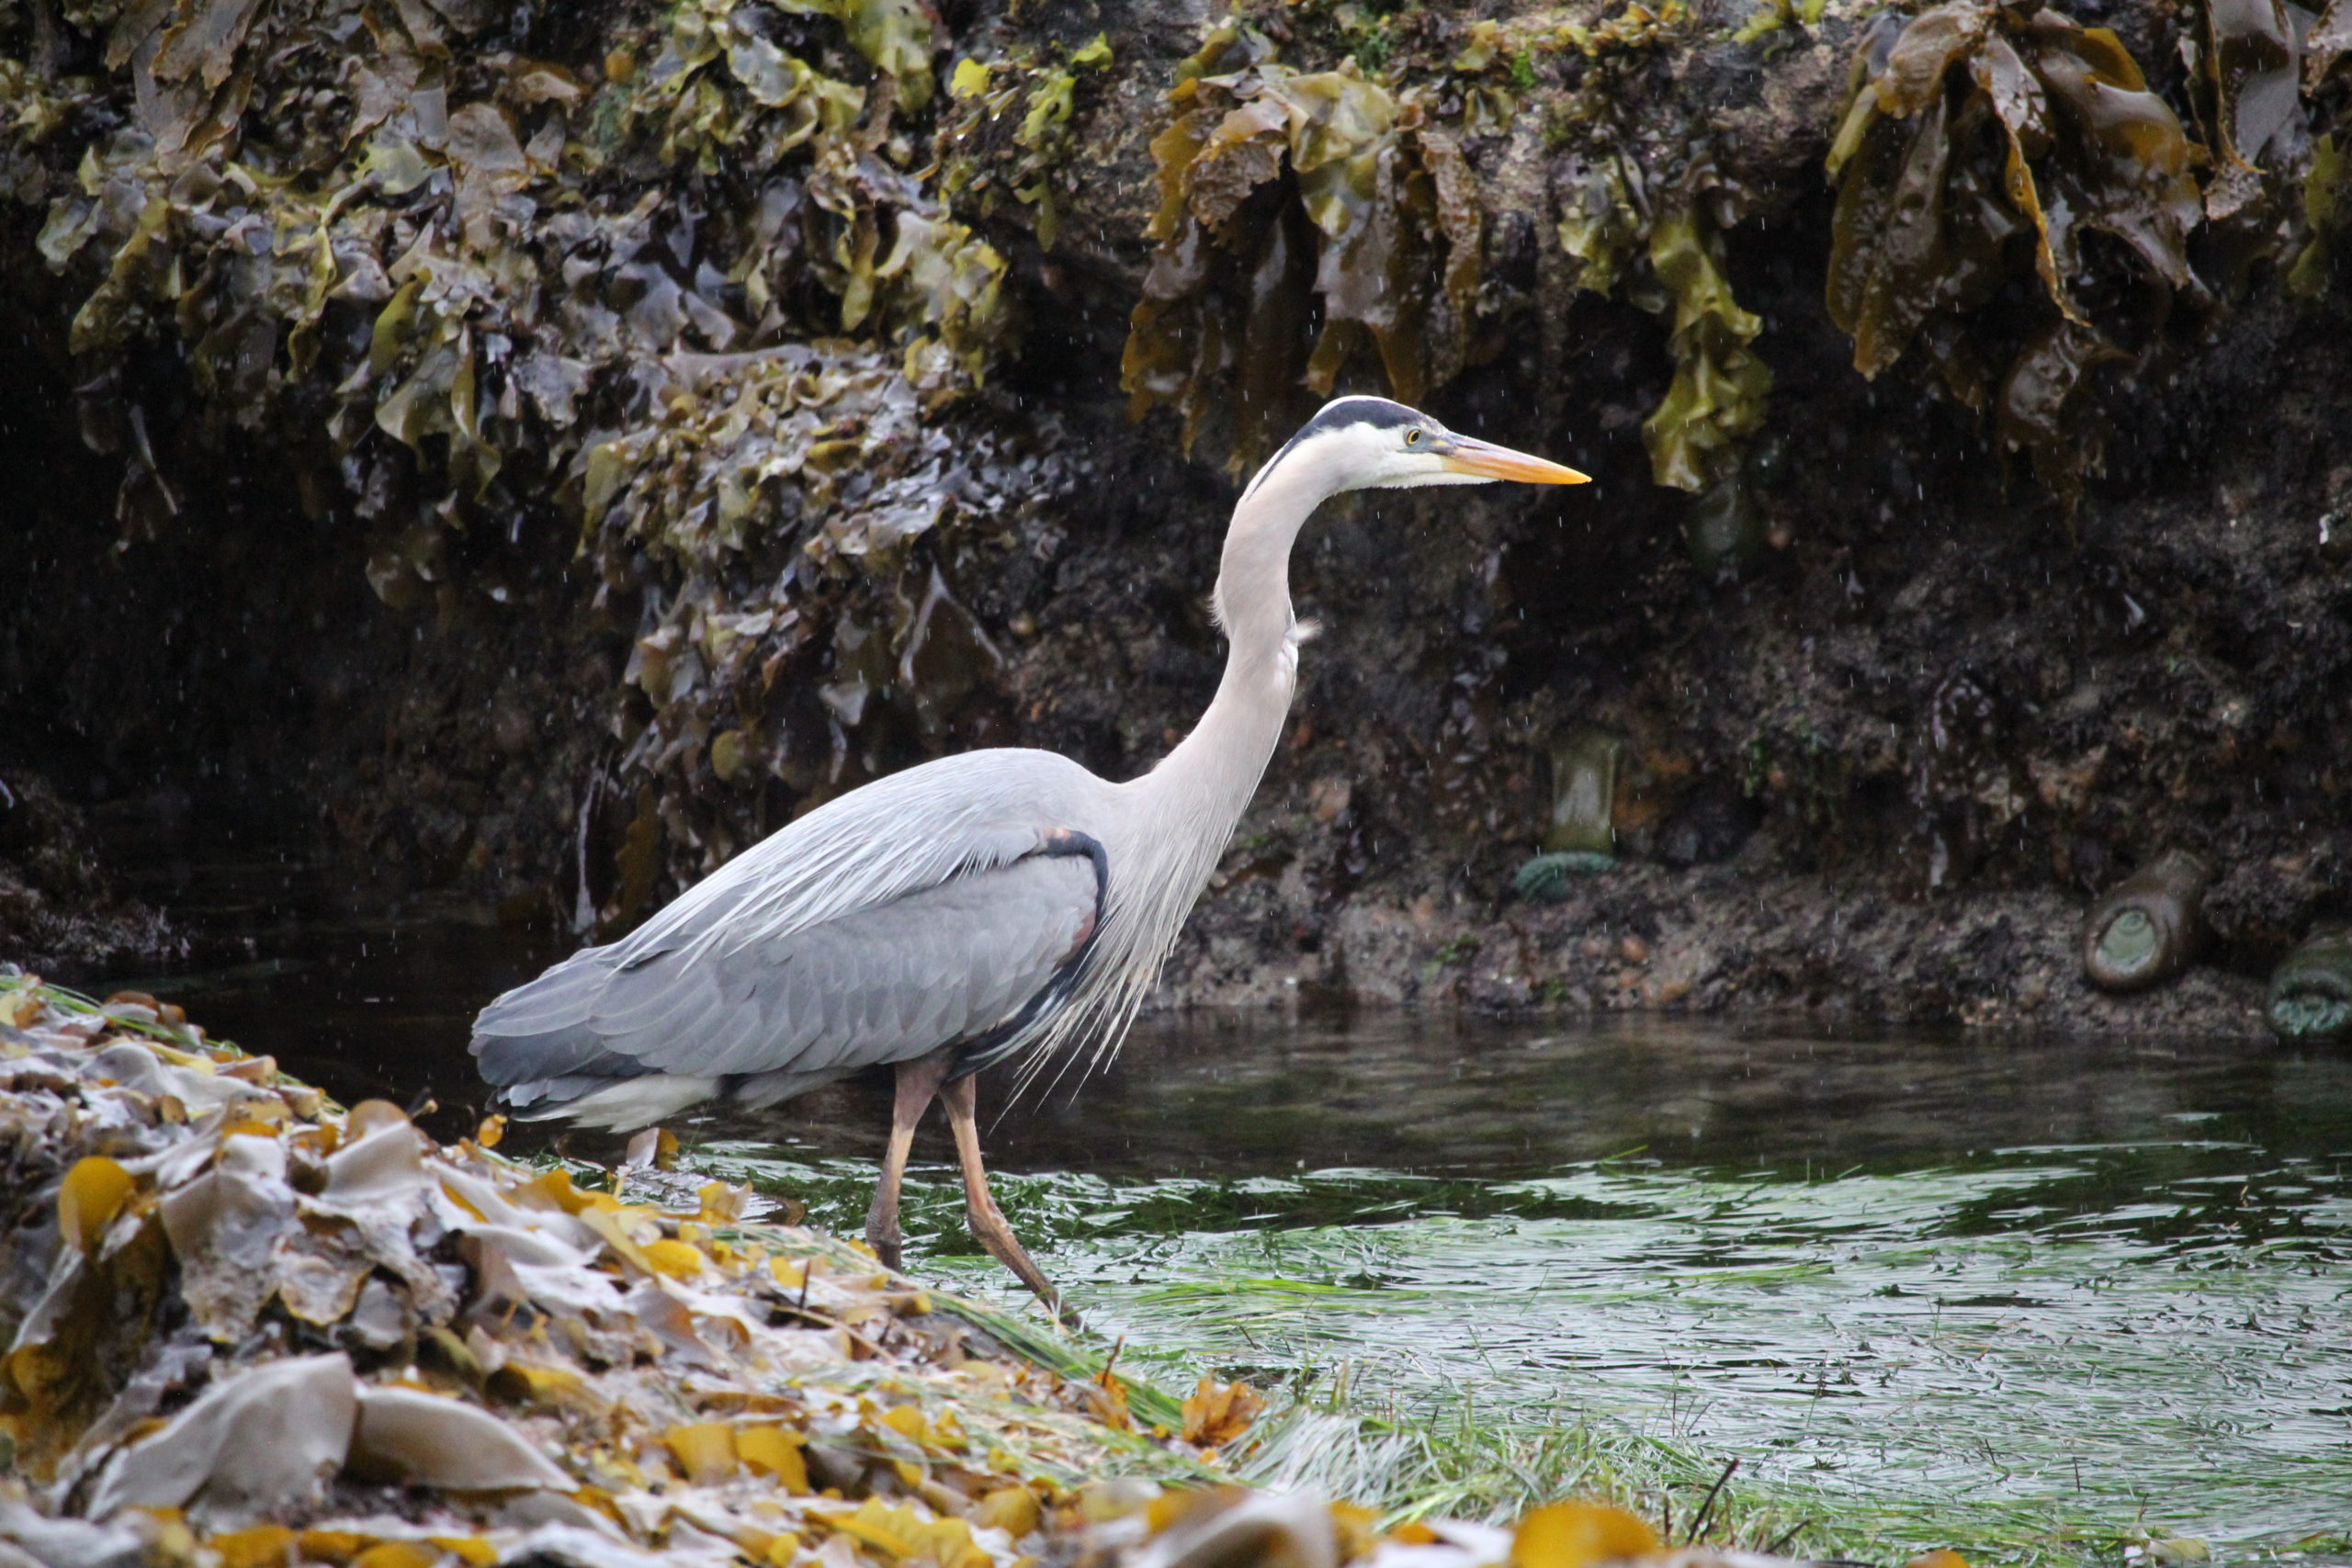
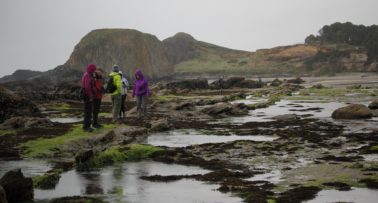
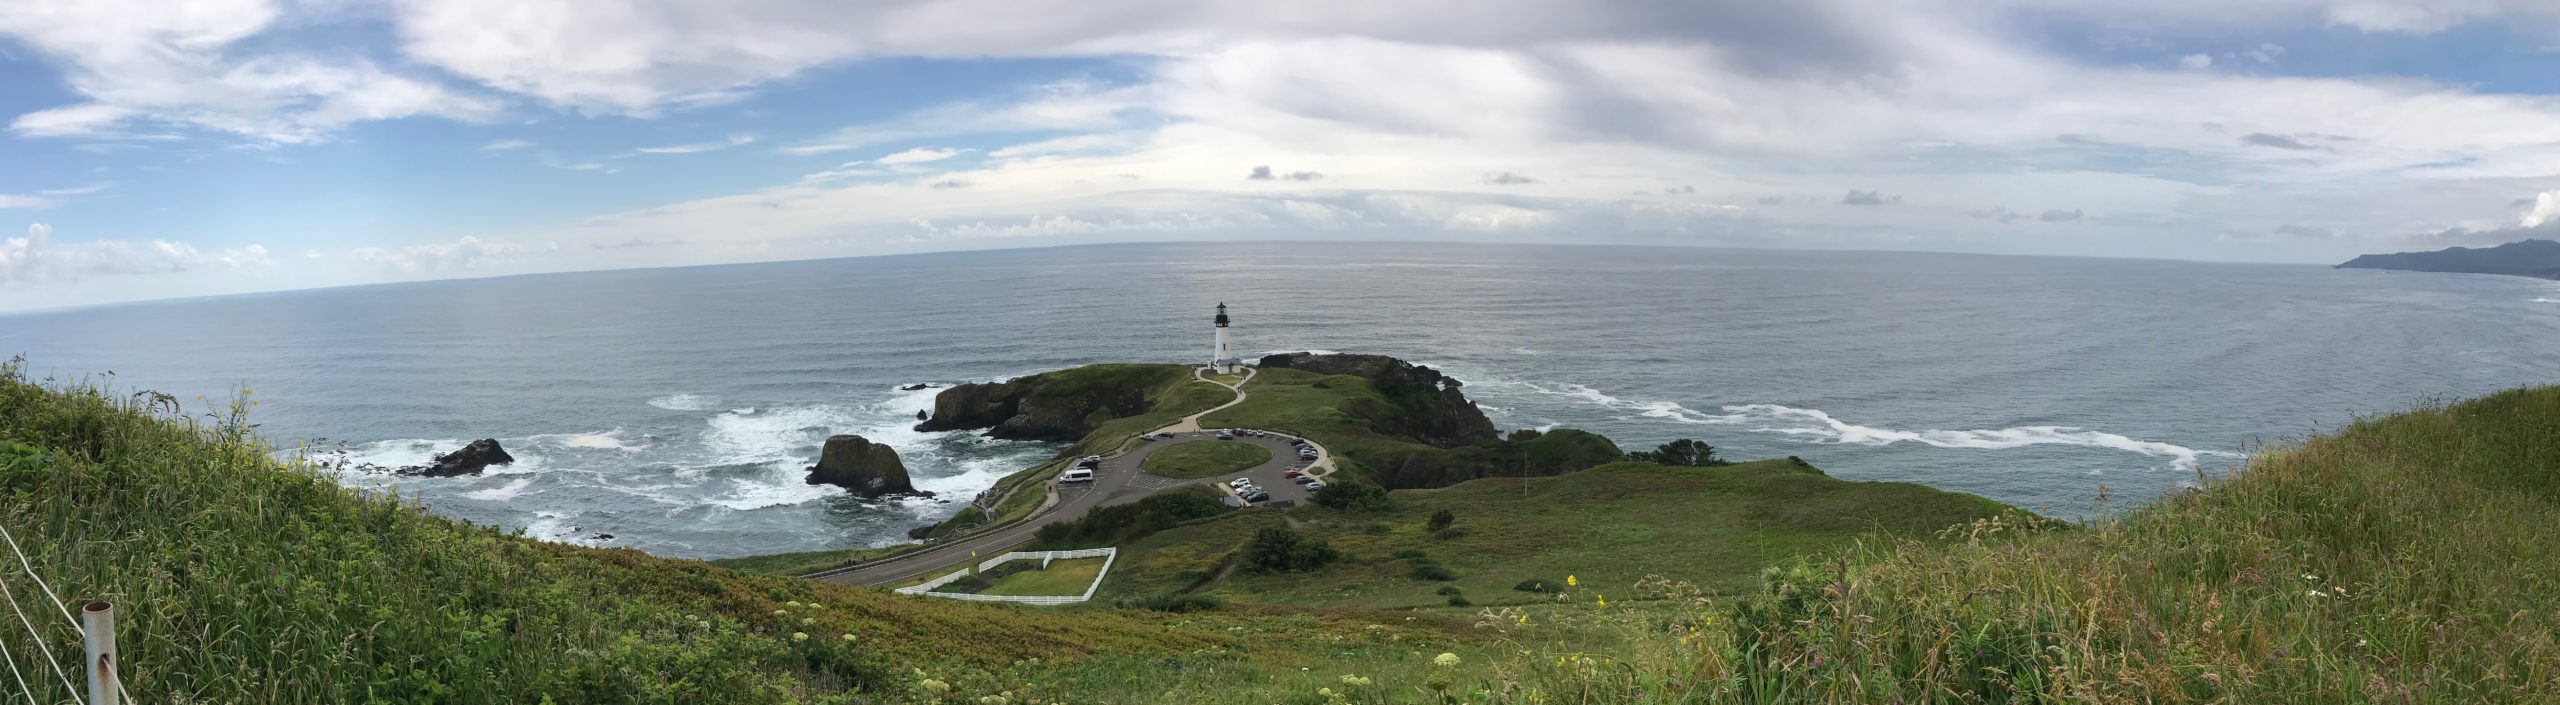
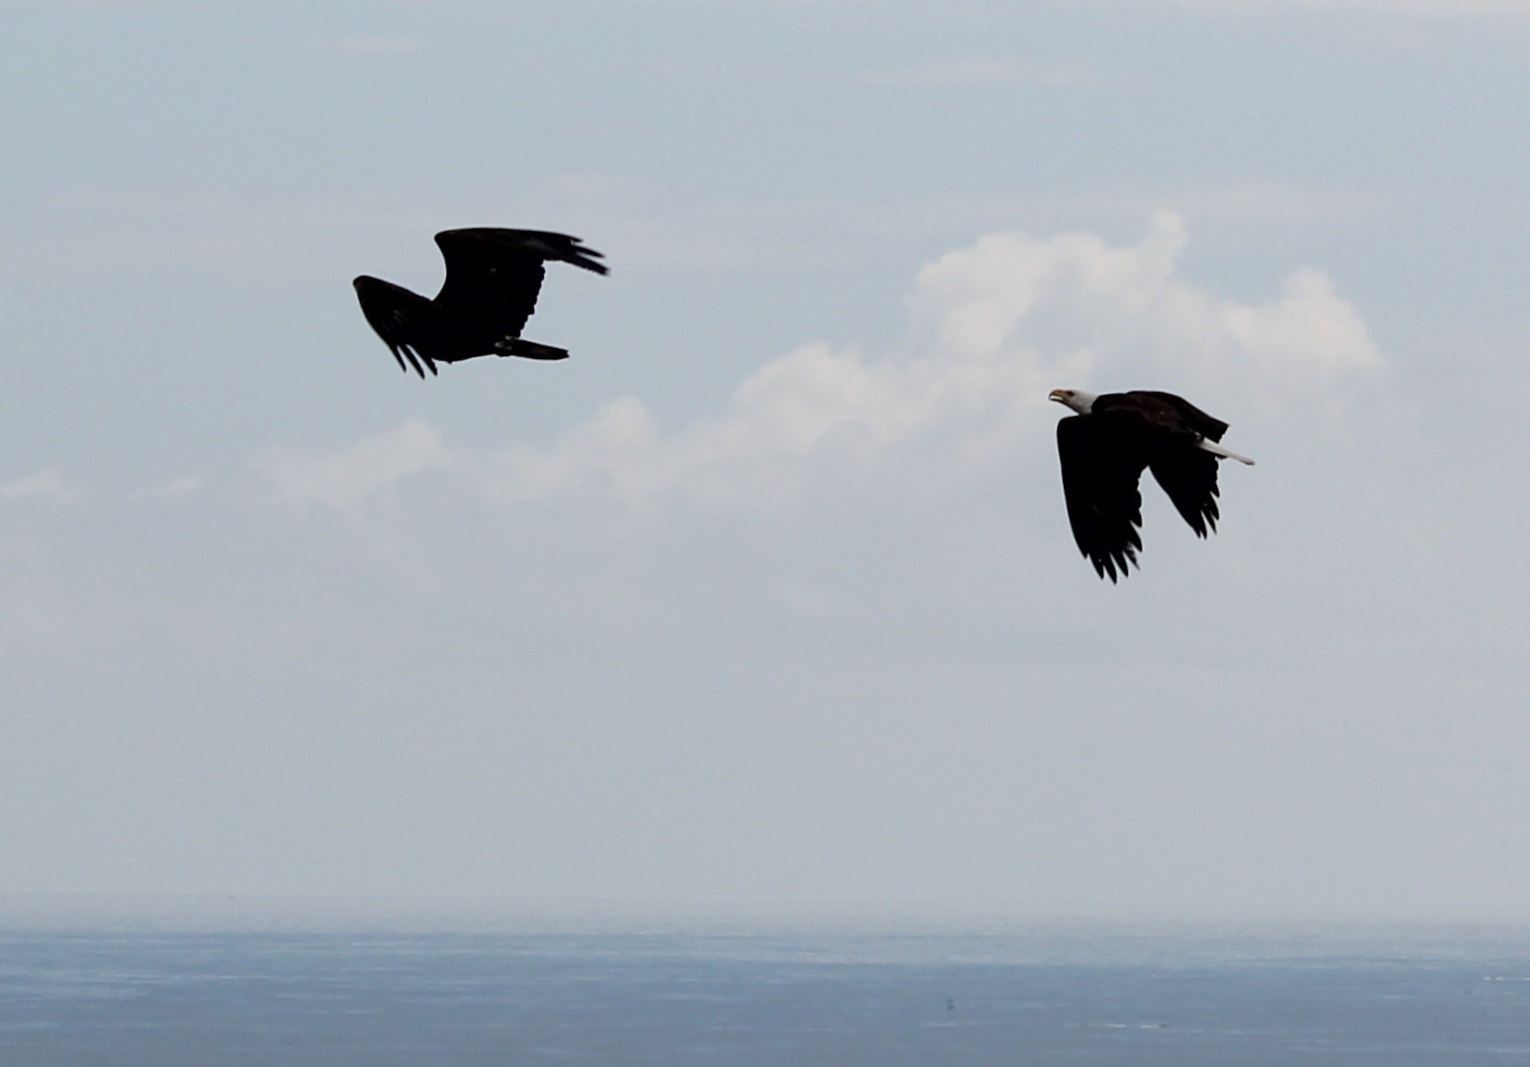
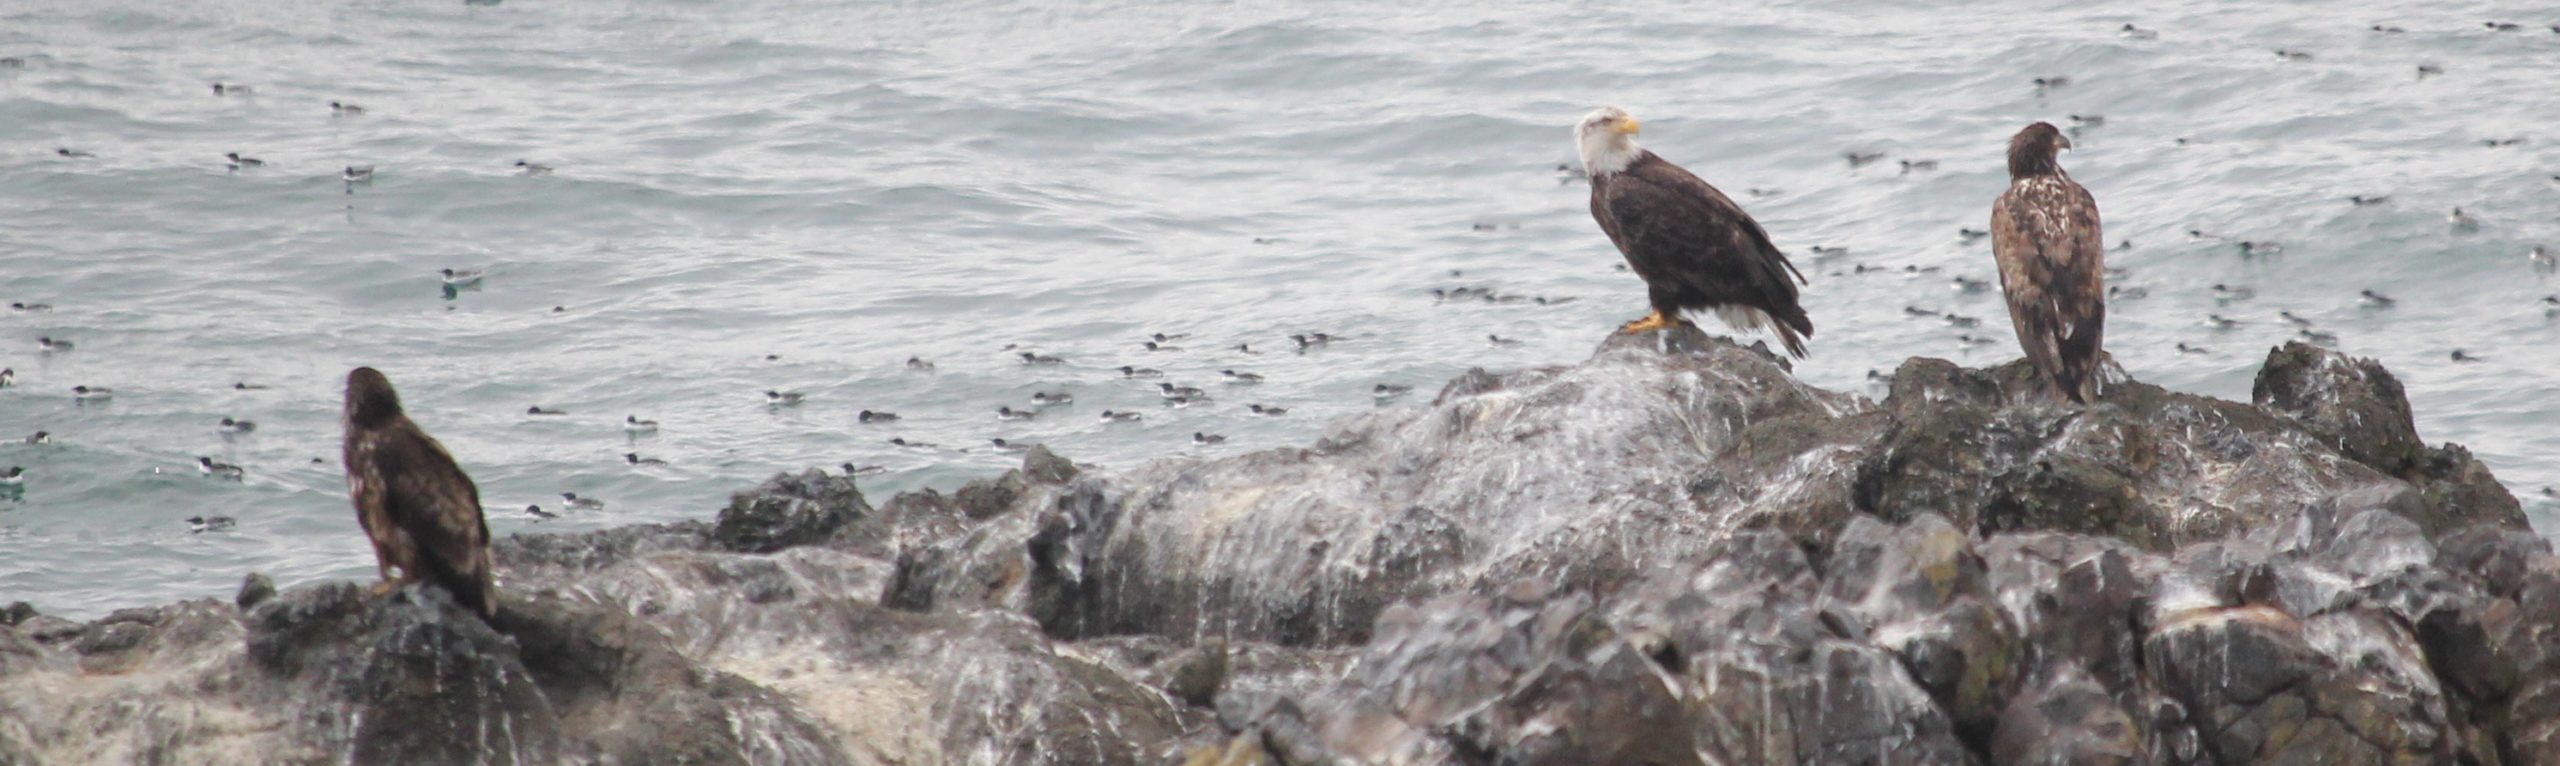
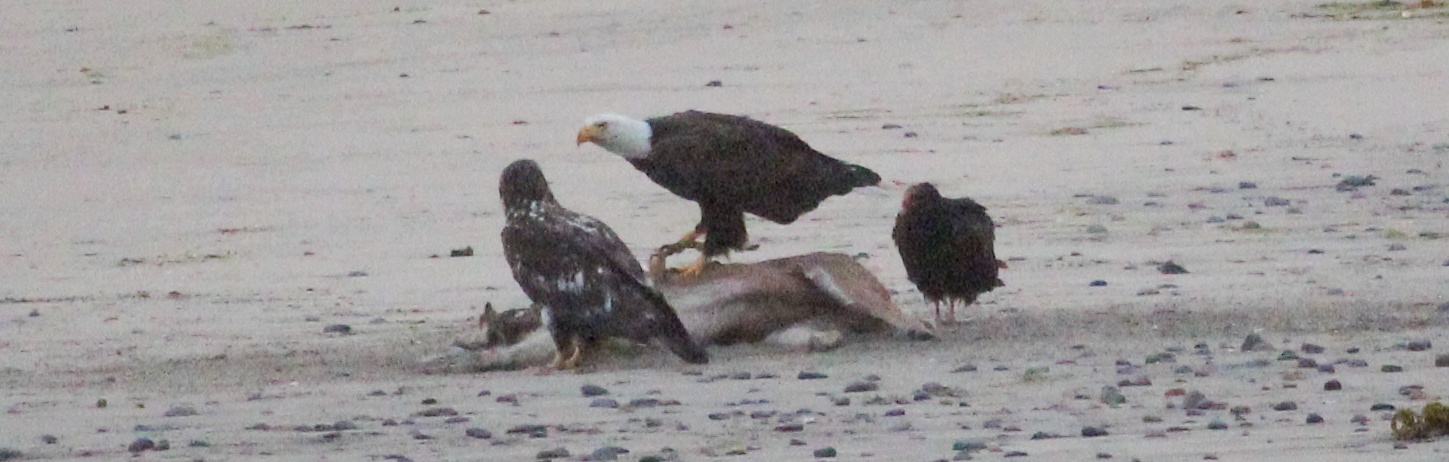
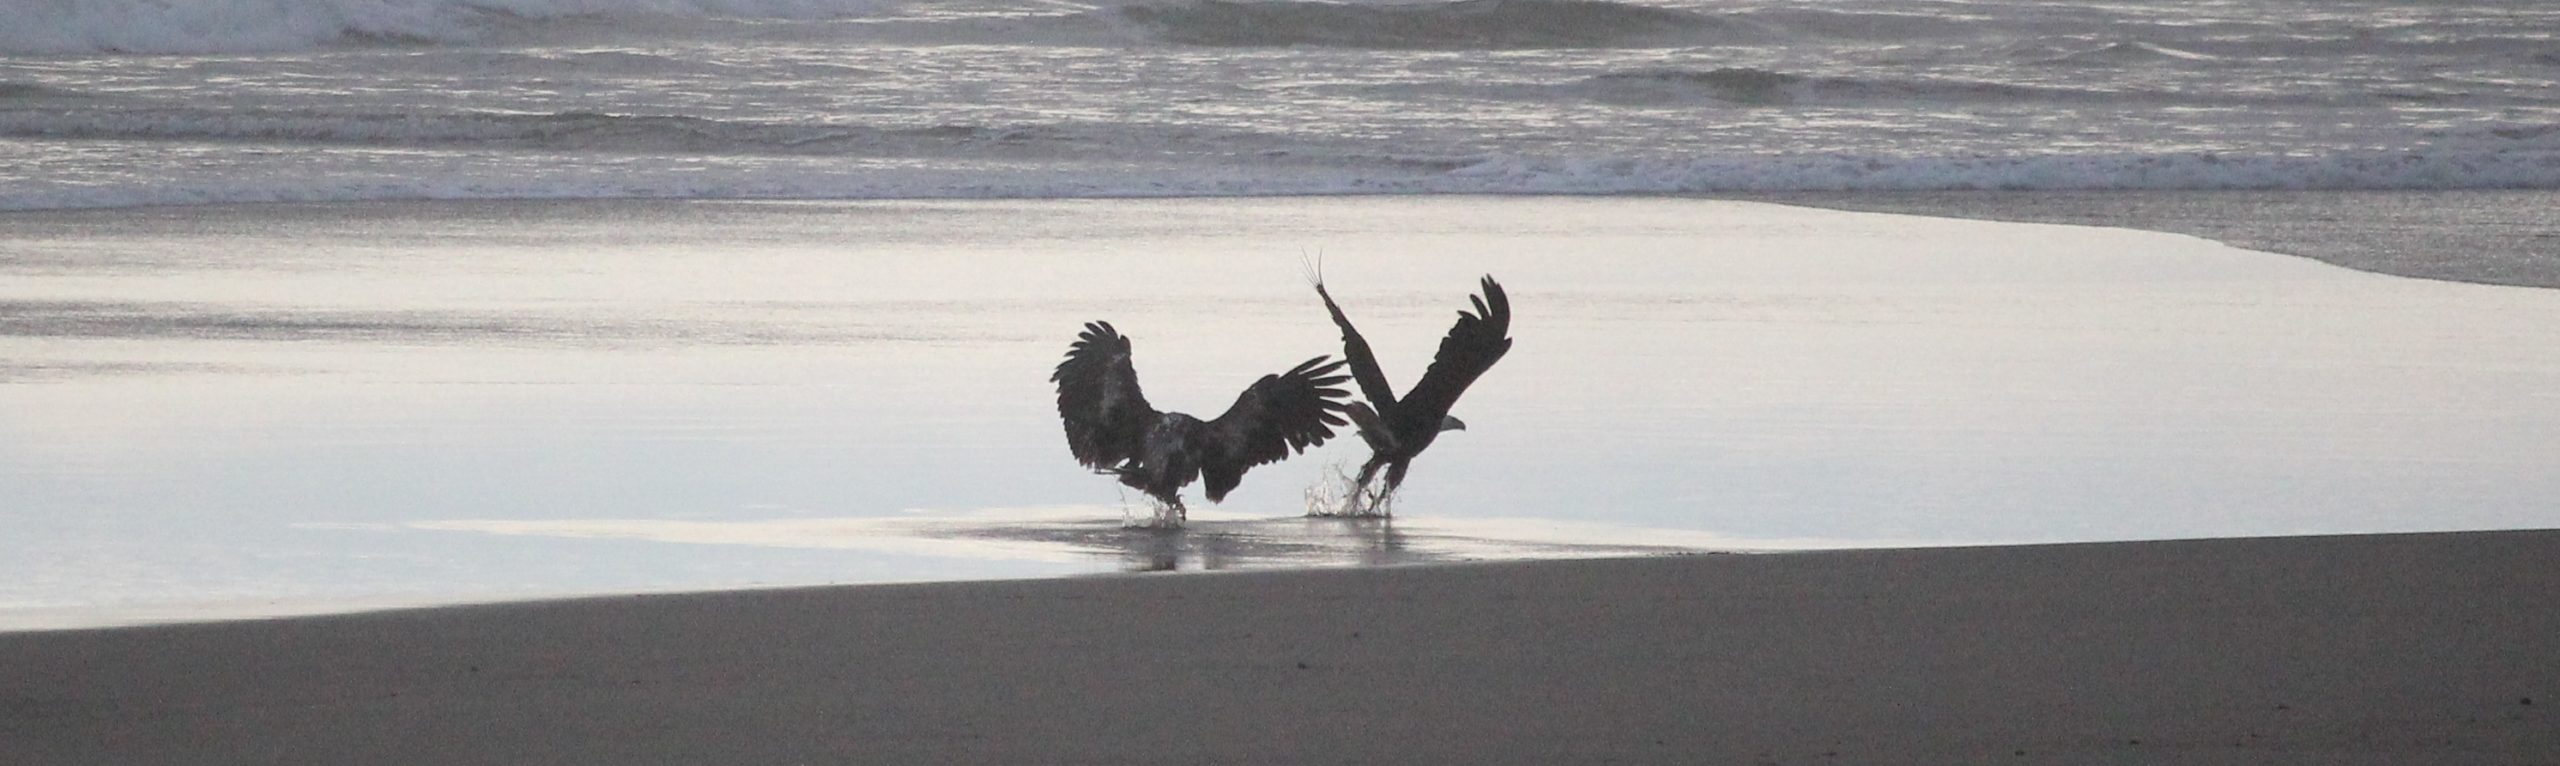
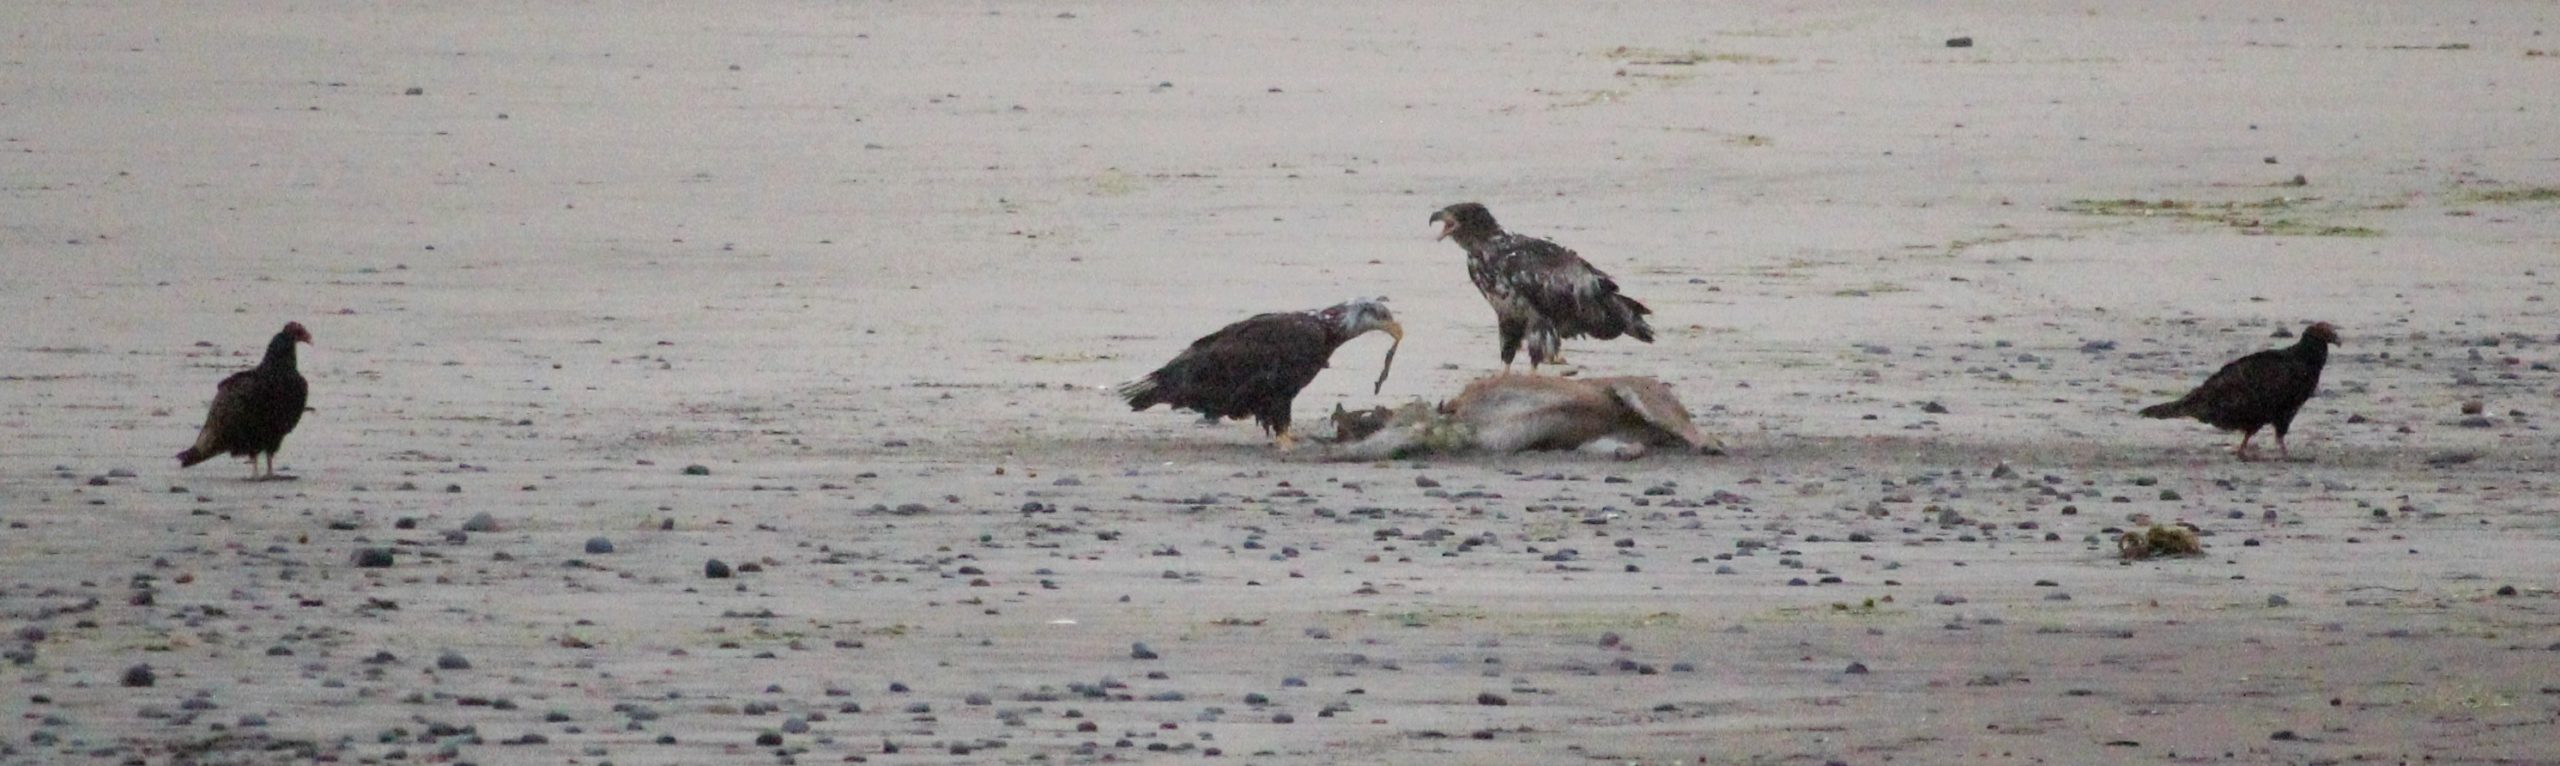
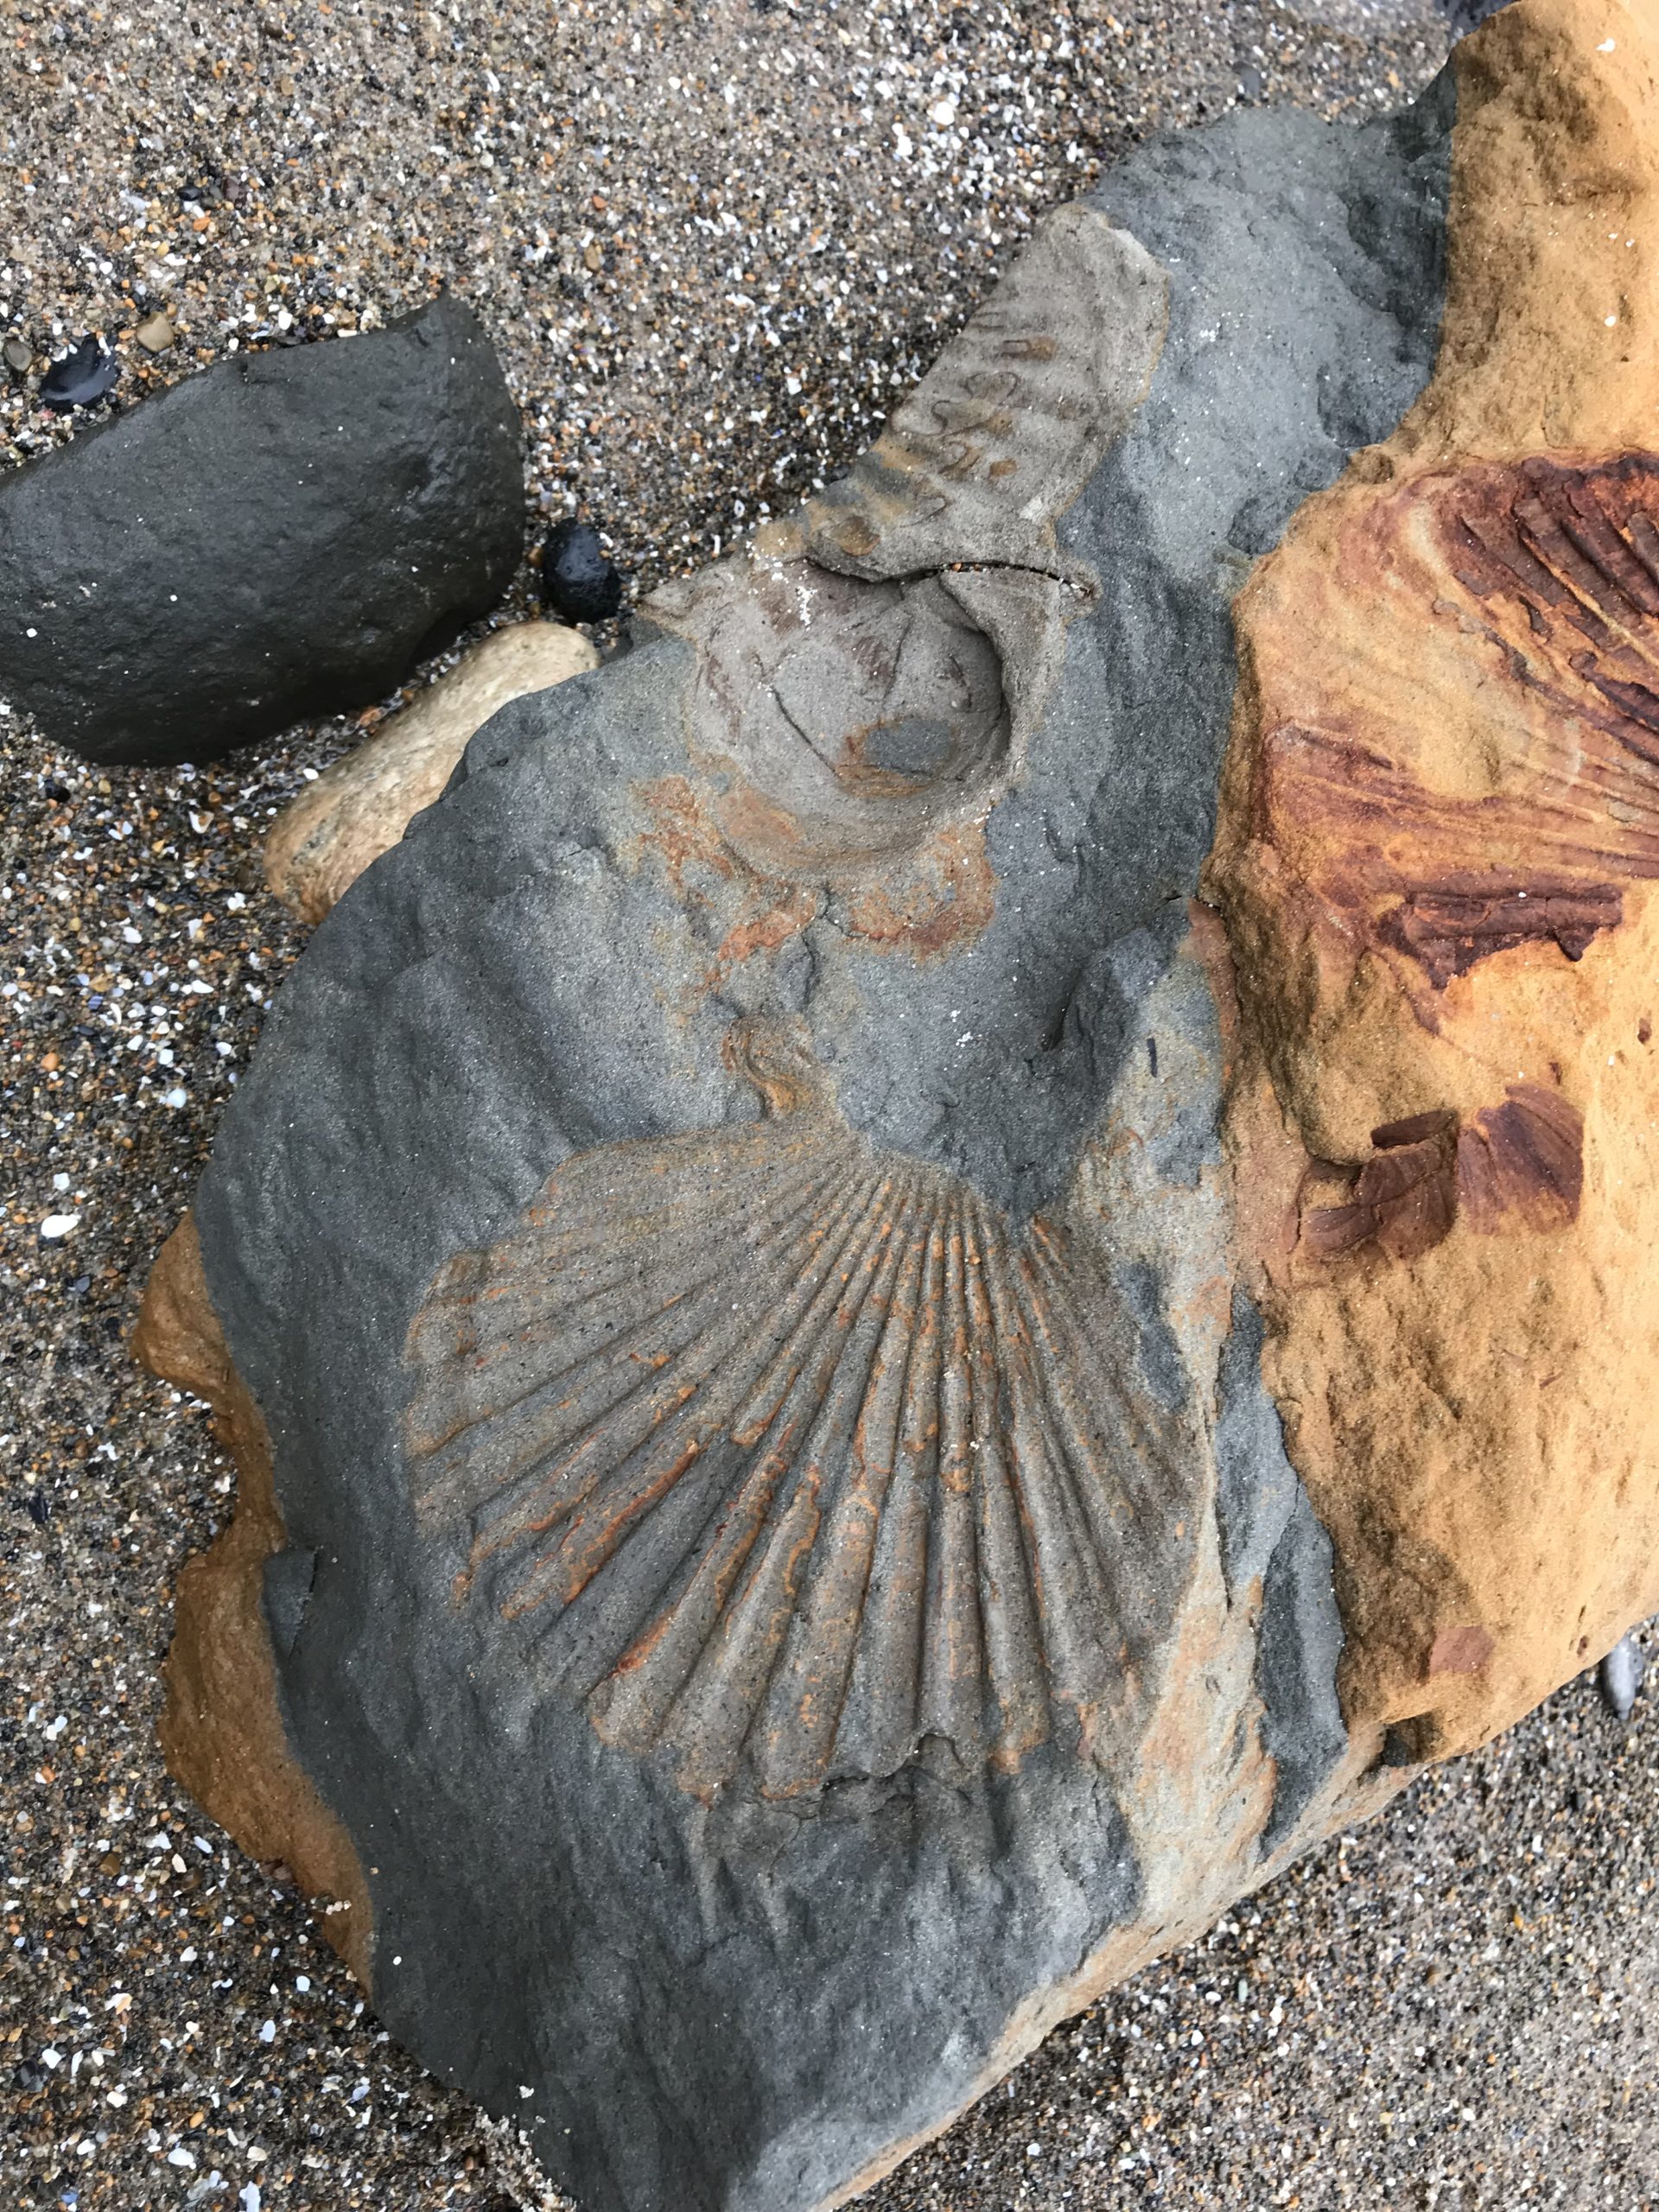
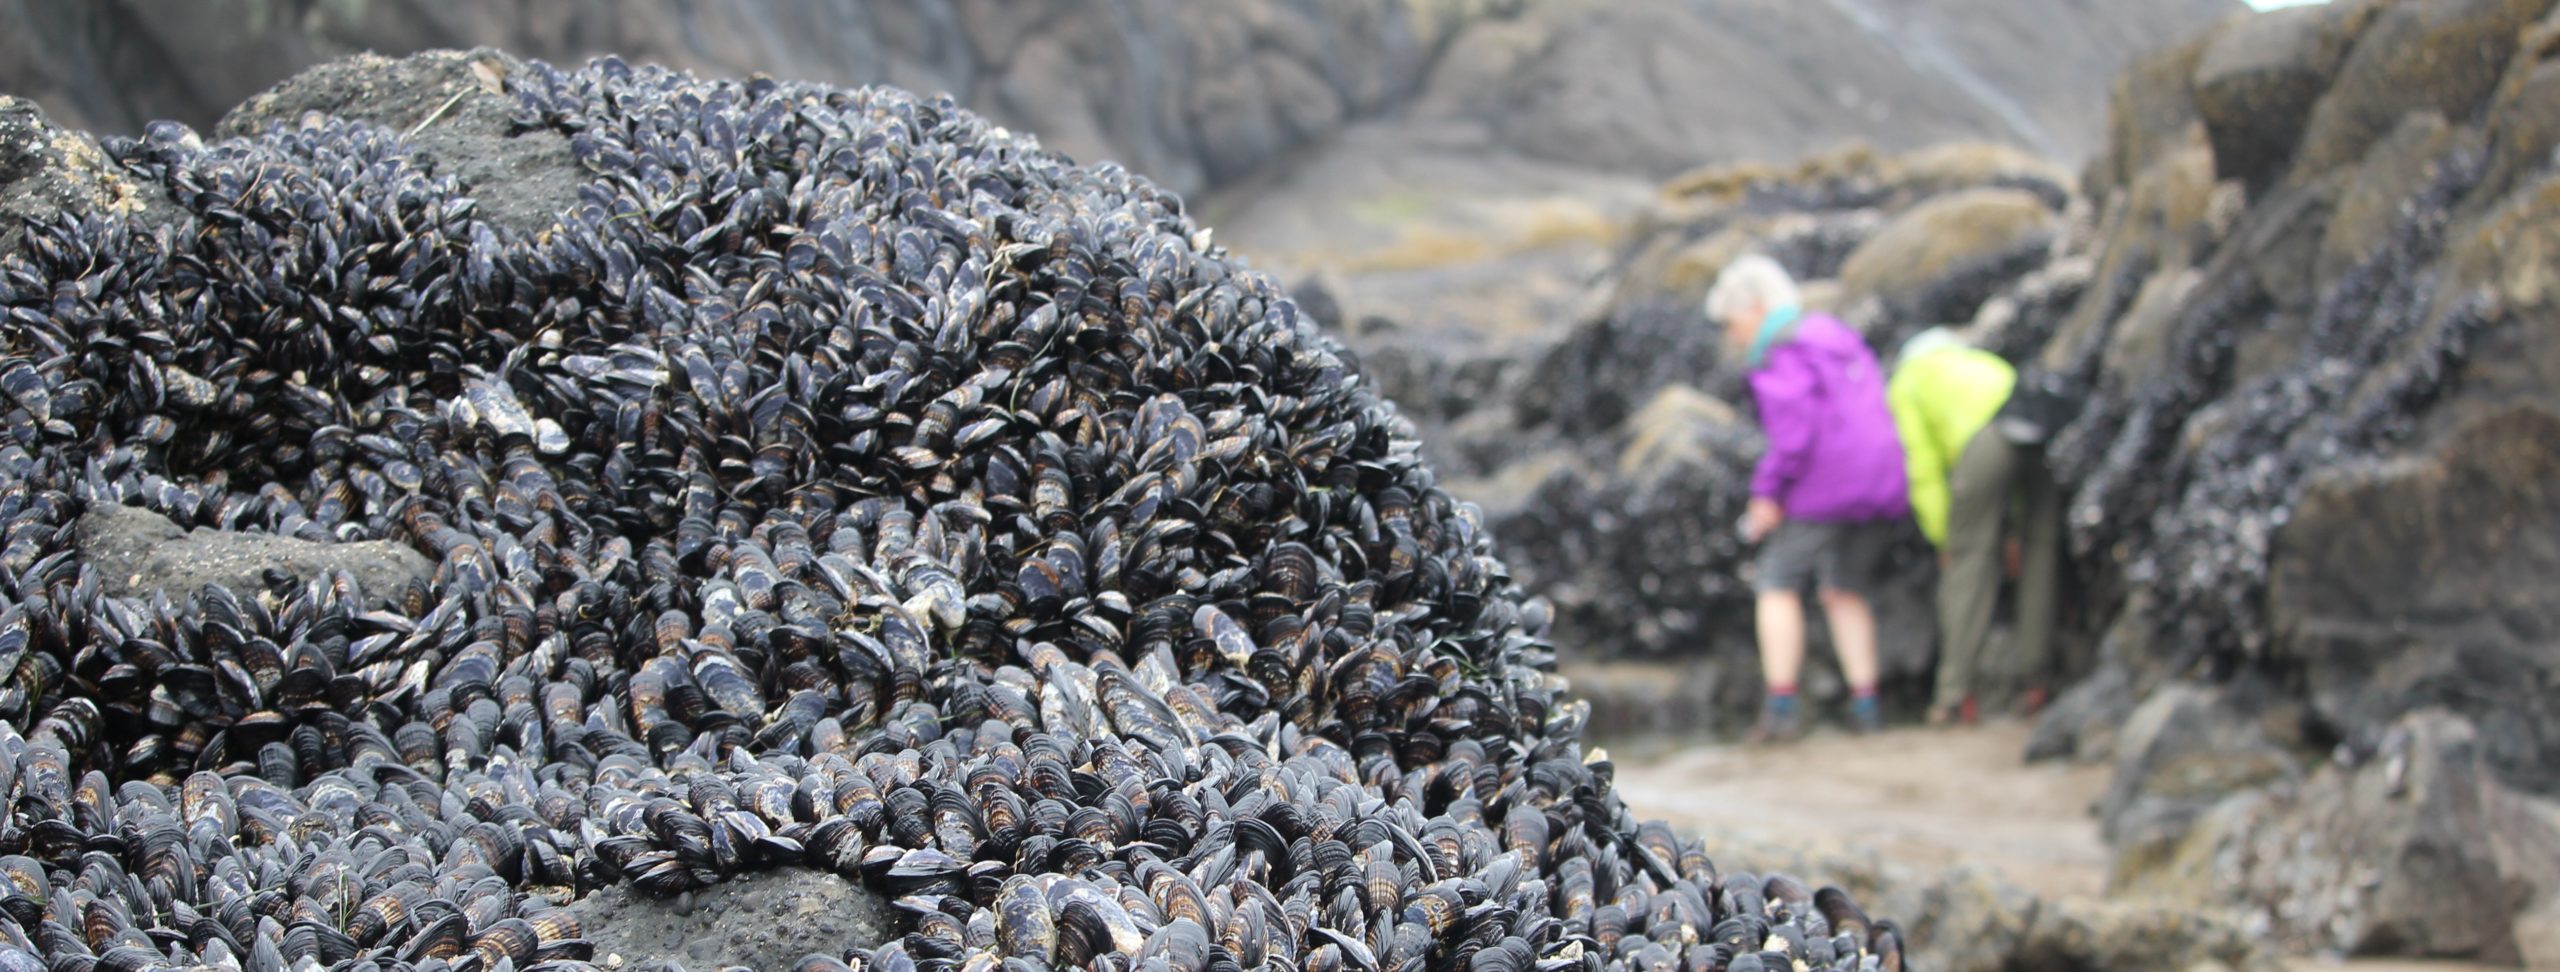
Day 2: At 7 am, we carpooled to an unnamed parking area expecting a filling parking lot, but to the trip leader’s surprise were only 3 cars. The rain, cool temperatures, and overcast skies likely contributed to the low turnout. We arrived about 2 hours before low tide to follow the tide out. This particular tide pool area is special because we can walk on sand and open rocky surfaces to visit ‘islands’ of marine life. After 2.5 hours, and a returning tide, we started back and met several rangers who helped to provide some more context to the area. One ranger said the rain had chased most away that morning. We saw numerous anemones, various seaweeds, chitons, crabs, limpets, mussels, and some small fish believed to be skulpins. Also observed were a pacific harbor seal, seagulls, and great blue heron. Later that morning, we drove to a coffee shop in Nye Beach to warm up. Then half of the group ventured back to the campground, and the other half visited the Hatfield Marine Science Center. That afternoon, we met up at the Yaquina Head Outstanding Natural Area and saw at least 4 bald eagles in addition to the common murres, surf scoters, and pigeon guillemots. One participant said that in 30 years of visiting Yaquina Head she had not seen that many eagles there as that day. That evening we enjoyed dinner around a campfire. Several of the group visited the beach at sunset to see up to 8 large birds visiting what appeared to be the body of a deer on the beach (the deer had not been there 24 hours earlier). The deer had been possibly struck by a vehicle on the nearby highway and made it to the beach before dying. Near the body were 8 birds; 3 were vultures, 2 were adult bald eagles, and 3 were juvenile bald eagles. The interactions between the birds were raucous at times. Just at sunset, the eagles departed and the vultures returned. That evening the rain returned.

Day 3: We awoke to a wet campsite and decided to meet in Depoe Bay at 9 am. Some broke camp early to grab some breakfast in town. In Depot Bay the group met up again, and we looked briefly for whales, but saw no signs, then drove north to Fogarty Creek to enjoy a -1.5 foot low tide. After an hour and a half, everyone departed for home.

Pacific Harbor Seal
A visitor to the tide pools during a minus low tide.
Great Blue Heron
Wet and overcast during our visit.
Yaquina Head Outstanding Natural Area. What was most amazing today is the lack of wind.
Eagles!
An adult bald eagle and what appear to be two juvenile eagles at the ocean’s edge.
An adult bald eagle and juvenile (at left) stand over what appears to be a deer carcass on the beach. A turkey vulture is at the right.
The two juvenile eagles are much larger that the turkey vultures who are keeping their distance.
Found some fossils while tide pooling!
Mussel colonies
Up close with a starfish

Practical Tips to Help First-time Campers: Tip #13 Taking the Next Steps

car-camping-tip-13Car camping is a fun way to experience the outdoors and spend time with family and friends; for some, it can be the catalyst into a larger world of exploration.

This is the true power of car camping; it introduces people to the outdoors in a safer setting, allows them to learn, build confidence, and then embark on even more exciting adventures.

At some point, while camping, the trail you hike during an outing will entice you to explore a little further. The campground might feel crowded and you hunger for more space. A scenic view will beckon you to see it more closely. You might even have thoughts about a more remote campground, or even backpacking. Listen to those quiet calls for they just might be moments of clarity…what Joseph Campbell referred to as a “call to adventure.”

Embrace those calls; go on a longer hike, join a hiking club, find out more about backpacking, attend a travel-related class about some cool destination. Read everything you can about making your time outside more enjoyable. Take those next steps. Go exploring!

Here are some resources that can help-

BACKPACKING BOOKS:

Ultralight Backpackin’ Tips, by Mike Clelland
Lighten Up by Don Ladigin
Both of these books are fantastic resources for lightening your backpack.

Yogi’s Pacific Crest Trail Handbook (Yogi’s Guide) by Jackie McDonnell
If you are interested in hiking the PCT this is an indispensable book.

FOLLOW YOUR BLISS BOOK:

Pathways to Bliss, by Joseph Campbell
A great introduction about following your bliss and the call to adventure.

OUTDOOR EDUCATION:

Leave No Trace
lnt.org
Ethics about how to enjoy the outdoors responsibly. Read up.

National Outdoor Leadership School
nols.edu
Wilderness education classes.

REI
rei.com
REI stores offer a number of free classes related to hiking, backpacking, and travel.

EQUIPMENT:

Anti-Gravity Gear
antigravitygear.com
Really good lightweight gear for backpacking.

Gossamer Gear
gossamergear.com
Lightweight equipment and they have a fantastic blog about backpacking.

Tarp Tents
tarptent.com
Ultralight shelters.

Ultralight Adventure Equipment
www.ula-equipment.com
Fantastic backpacks – Made in the USA.

TRAVEL:

Lonely Planet
lonelyplanet.com
Excellent guidebooks for the budget-minded and experience-seeking traveler, they tell it like it is.

Hostelling International USA
hiusa.org
A fun and affordable way to travel and meet interesting people. I met my wife while hostelling!

Rick Steves’ Europe
ricksteves.com
A really good travel resource for heading overseas.

Transitions Abroad
transitionsabroad.com
A great resource for meaningful work, living, and study abroad.

Practical Tips to Help First-time Campers: Tip #12 Want to Go Camping? Have a Plan

IMG_0442The modern world is a busy place; it is full of technological distractions, work commitments, and family duties. …It is easy for a year or more to swiftly zip by. If going camping is a family goal – you need to have a plan.

A plan helps to focus your actions and clarify what is relevant. Think of a plan like a compass and a map that help you stay on the right path and keeps you from becoming lost. If you take a wrong turn you can always reorient yourself and find your way to the destination.

A plan for going camping does not need to be grand in scale or expensive, it can be simple and affordable. Sometimes it is best to start small and build your experiences. If you’re not sure where to start, begin with this upcoming weekend, go on a hike with your family.

It is important to celebrate the success of your plan – even the small ones. A good way to celebrate a successful outing is to start planning the next trip while in the car returning home. Always keep a new plan in front of you.

Implementing a plan is not easy, they might take longer than you want and distractions will surprise you. When these occur take time to reinvigorate, take a walk, clear your head, and get your mental map and compass pointing in the right direction.

How much is the time with those you love worth? Do what it takes for your plan to succeed.

Photo: Car camping in the beautiful Sierra Nevada Mountains of California.

Practical Tips to Help First-time Campers: Tip #11 Fire’s Gift, Elder-wisdoms

IMG_0635Sharing stories around a campfire is as old as humanity. For millennia it was the time-honored way for the elders to share their wisdom and help the next generation prosper. In modern times the old tribal fire has been replaced by the glow of a TV, and the elders are considered relics …something profound has been lost.

If you have the opportunity to rekindle this time with elders, do so. Listening to their stories can be really fun. You might just hear about great places to explore, tales of adventure and faraway places. You will feel their regrets and be entertained by their anecdotes of enduring friendships. As the night mellows and the fire turns into calming embers – listen carefully for the old ones might begin to share their wisdom.

Below are several of my favorite elder-wisdoms about camping. I hope you discover some of your own from listening to the elders.

Elder Wisdom #1
“Life is really, really short – live your life well.”
This is the most frequently offered piece of advice. No translation needed.

Elder Wisdom #2
“Things don’t make you happy; family, friends, and your time with them do.”
Translation: A rich outdoor experience does not have to be expensive. Elders frequently see young families spend a lot of money on high-end equipment, or bring a multitude of stuff to the campground. The families are seeking enjoyment in the outdoors, but try to find it through material things rather than strengthening relationships. As a result, the families leave the campground tired, upset, in debt, and emotionally unfulfilled. Possibly, they will never try camping again.

Elder Wisdom #3
“Slow down. You don’t have to do everything at once.”
Translation: Start with the basics and build your equipment and experiences. A common error first time campers make is trying to do everything at once. Instead, start by camping at a comfortable experience level and build on those lessons learned. The same goes with equipment, start with inexpensive basic stuff and build out what you need to get to the next level. If you make use of your time and enjoy the journey, camping can provide a lifetime of adventures.

Elder Wisdom #4
“Decide what is important, then follow your heart.”
Translation: People want to go camping with their family, but feel they cannot escape the responsibilities of a never-ending cycle of work, family, and bills. But, to their credit, families are most of the way out the door – they have already spent a great deal of energy thinking about the who, what, where, when, why and how of camping: Who do they want to go with? What do they want to do? Where do they want to go? When do they want to go? Why is it important? How will all this be accomplished? Just thinking about these questions means that you are most of the way to getting outside.

I found this elder wisdom to be rich, which is why I’m sharing it with you. Help this elder wisdom work for you, go camping more by having a plan.

Practical Tips to Help First-time Campers: Tip #10 Being Safe around the Campfire

IMG_7489The campfire is a preeminent symbol of camping; it is the focal point for interacting with family, sharing stories, preparing food, and just enjoying a peaceful evening. While campfires are wonderful gifts to enjoy, they are unforgiving of mistakes and can cause great harm if not respected. Thinking about fire safety should be at the heart of every camping experience. Remember, fire safety begins with you; that said, here are suggestions for having a safer campfire during your next camping trip.

Know the Purpose of Your Fire

The number one mistake new campers make is to not understand the purpose of their fire. Is the fire for cooking, enjoyment, warmth, light, or a combination of all of these? Knowing the purpose will help you answer some basics questions: What amount of wood is needed? How much money will the wood cost? What equipment is needed? What will be size of the fire? How how long the fire will be used?

Ask Additional Questions Before Striking a Match

Set yourself up for success by asking additional questions before you strike a match: Is the fire danger high or low? Is there extra wood to buy? What are the rules on using downed wood? Where will the wood be stored? Will people trip over the wood? Does the campground provide a place to dump ashes? Have any situations changed in regards to having a campfire? Always check at the Ranger’s Station about current weather/seasonal changes.

I’m not trying to dissuade you from having a fire, just as a first-time camper you need to understand that you have a responsibility to yourself, your family/friends, and others around you when you have a fire. Always ask questions.

Who Owns the Fire?

Families (even multiple families and groups) can have different people tending the fire. While communal fire care has advantages, it is easy for people to become distracted by other duties and think that someone else is managing the fire. The results can be catastrophic. It is true that a safe campfire is the responsibility of everyone in the campsite, but take it a step further, and ask: Who is THE person responsible for the fire? When making a campfire agree who is the individual (an adult) responsible for the care, feeding and safety of the fire. It is all right to switch off this responsibility, but someone should always have ownership over the fire.

Keep it Small

car-camping-tip-10aBig fires use a great deal of wood, burn hot, and burn fast. While there are occasions for large campfires they can be expensive to provision with wood and difficult to control. A smaller fire can still provide needed warmth and the enjoyment expected during a camping trip. Keep fires small to save money and keep those around you safe.

Don’t Bluff

Sometimes people, who cannot start a fire, try to bluff their way out of this fact. At best, they appear foolish by tossing a leg-sized log on a tiny flame; at worst they use excessive amounts of accelerants, which ignites a mushroom shaped fireball that could injure people. If you are new to making campfires that is OK; read up on the subject and ask the local camping store for suggestions about safe and simple fire-starters.

Keep Water Handy

Fires can spark and spit coals. Make sure you know where the water spigot is located in the campground. Also, keep water close (like a bucket filled with water) so sparks can be doused, or cool a painful burn.

The Last Match

Kids are fascinated by fire. As a parent, turn this fascination into actions that will help them grow and reduce the desire to “play” with fire. In my family, when I introduced a respect for fire to my daughter, we practiced a game called, The Last Match. My Father introduced it to me when I was a child, it goes like this: I was given one match to light a campfire. I had to make a fire with this one match or the entire family (pretending) would freeze to death. Dad always had ample matches in reserve and there was no danger of freezing, but the challenge remained. I spent time gathering materials, learning about fire starting techniques, and most of all I listened and spent time with my Father. Today, I play the last match game with my daughter. When we camp she is responsible for making sure the tender and kindling are prepared, the wood is properly stored, water has been acquired and the purpose of the fire is known. I own the fire, but she is responsible for all of the supplies and lighting it (with my direct supervision). If the fire does not ignite we study the situation, she reviews her work and makes changes where needed. Sometimes several attempts are required, but all the time the mistakes are turned into learning experiences. It is a fun activity because it positively directs her desire to play with fire and gives her knowledge for the day when she might really need to light a fire in an emergency situation.

Pay Safety Forward

A childhood friend of mine once burned her feet when she was camping. She was playing hide-and-seek and jumped into an unused fire pit. The area looked like normal ground, but underneath the surface was searing hot coals. Fortunately, her father had been trained in First Aid and was able to treat her until a hospital could take over her care. It was a painful ordeal for the young girl that lasted several months. The lesson is this – when you leave your fire confirm it is completely out and all coals are extinguished. Depending on the campground you may have to extinguish it with water, or empty the coals into specially designed cans that hold ashes. Inquire at the campground about their preferred method. When you leave a campsite, pay it forward; you are responsible for providing a safe campsite for the next family.

A campfire provides warmth, comfort and is a wonderful addition to any camping trip. But, fires are unforgiving of mistakes. Thinking about how to remain safe around fires is a responsibility of every camper.

Once safety has been addressed the true reason for having a campfire can reveal itself, spending time with others and sharing something that is so basic to being human – reflecting on life.

Note: Fire safety is of paramount importance. Read everything you can about fire safety. Talk to fire professionals, park rangers, and family members who have experiences with keeping fires. Every little bit of knowledge can help to keep you and your family safe.

Practical Tips to Help First-time Campers: Tip #9 Child Safety in the Campground

car-camping-tip-9aCar camping is an exciting way to introduce young children to new experiences, but balancing safety with a child’s curiosity can be challenging. Most parents reach for a book or surf the internet for information, but many of these resources only focus on fun activities and omit the basic point: before a family can have a meaningful camping trip, the parents must feel secure.

Help everyone in the family feel safer during the next camping trip:

Take an Orientation Walk

Campgrounds can be fascinating places for young children, help them explore it with an orientation walk. Help the child locate the closest bathroom, the trash/recycling cans, and where to find the Ranger’s Office or Campground Host. If you have a campground map take it with you; identify some prominent landmarks as you help the child explore. Going on an orientation walk helps everyone create his or her own understanding of the campground and feel more comfortable.

Know Your Campsite Number

car-camping-tip-9What is your campsite number? If there is one thing a young child (and parent) should remember, it is the family’s campsite number. To a young child, this is not just a number; it is the place where they can find comfort and safety. It will be one of the questions a Park Ranger will ask a child who is lost.

Identify an Emergency Location

Identify the location where your family should gather if there is an emergency (like a forest fire, earthquake etc.). Everyone should know where this gathering spot is located. Depending on where you are camping the emergency location could be your campsite, the car, the Visitor Center or another agreed to spot.

Locate the Essential Stuff

If a problem arises, it can be exacerbated by not knowing where the essential items are located. Everyone should know where the first aid kit is stored. Each member of the family should have a flashlight. If a child needs access to regular medication, do both parents know where it is kept? If a family member needs access to the car, where are the keys? Other essential items can include a campground/park map, compass, sunglasses, pocketknife, matches, insect repellents, hats, and sunscreen.

Boundaries

A campground can appear like a big playground for children. It can be easy to get caught up in the play, wander too far and have the parents worry. Parents should set boundaries so kids know how far is too far.

Calling for Help

All parents are concerned about their children becoming lost or being in dangerous situations. As a precaution, many parents give their child a phone. Phones are good ideas; however, too often the campground is located in an area that does not receive cell service. As a reliable backup, all kids (and parents) should have a safety whistle on their daypack. This said, there is a great responsibility for both children and parents about when a whistle is used. The circumstances for when a whistle is used should be discussed thoroughly and understood by the family.

Practical Tips to Help First-time Campers: Tip #8 Make Mother Nature Proud – Use Campground Etiquette

car-camping-tip-8Etiquette is about being courteous and having good manners, so how does this translate to camping?

Be Neighborly

Being outside allows people to slow down and rediscover the lost art of being neighborly, which is often lost in the frenzy of urban life. When you are at the campground, and you pass another person, acknowledge his or her presence with a head nod, saying Hello or even Good Morning. At a minimum, be civil to folks you don’t know. Most of all respect the space of other campers. If you blunder through someone’s campsite excuse yourself for the intrusion.

Get to Know Your Neighbor

Introduce yourself to your neighbors as soon as you move into your campsite. This can be as simple as waving, by saying Hello, or even formally introducing yourself with a handshake. An introduction and handshake are best. There are several reasons for this: introducing yourself gives you credibility as a reliable neighbor, establishes your space, and communicates (important concept here) that you are an outgoing individual.

Be Aware of Pollution

Pollution comes in many forms: light, noise, and trash.

LIGHT

Lanterns are a great way to illuminate a campsite, but lantern light can become pollution for neighbors when it is very late at night. A lantern can produce enough glare to illuminate the inside of your neighbor’s tent at a considerable distance away, which can keep them awake. When using a lantern, shield it so the light stays more within your location and does not illuminate other campsites. The same goes for flashlights; they should be used respectfully and not aimed at tents when people are sleeping.

NOISE

Noise happens, but when noise becomes a continual annoyance for neighbors, it becomes pollution. Noise pollution can include: loud kids, generators, radios, electronics, and even a family preparing, eating, and cleaning up after dinner. Observe campground quiet hours; in most campgrounds, this is between 10 pm – 8 am the following morning. Radios can be a big irritation for neighbors. Most people are nice and never say anything, but the reality is people do not want to “enjoy” another person’s music.

TRASH

Since the beginning of time, humans have generated trash. We still do, but this does not mean campers have to be trashy. Always leave your campsite cleaner than you found it. When you’re on a day hike take a small trash bag with you to pick up any trash you find along the trail.

Most people consider camping as a time to cut loose, kick back and just hang out. Camping can be these things, but it should be approached more as an opportunity to be personally responsible, diligent, and being aware of your surroundings. You are your fellow camper’s keeper, and observing campground etiquette can help everyone have a better time at the campground. And it will you make your Mother (Nature) proud!

Next, is a tip about child safety in the campground.

Practical Tips to Help First-time Campers: Tip #7 Choose the Best Soap

car-camping-tip-7aAfter a few days of family camping, it becomes apparent that everyone is in serious need of a bath; your sweetheart has hair that resembles a shrub, you wonder just how clean your kids’ hands really are, and you are starting to smell like Bigfoot.

You reach for some soap and find a menagerie: squeeze-bottle dishwashing liquids, motel-sized soap bars, and decades-old travel shampoo bottles. These are unsightly, unorganized, and take up valuable space in the car. Is there just one soap, a “super soap” that can be used for everything; dishes and humans?

Such soap exists! It is easily obtainable at many outdoor retailers and stores. This soap can be sold under various brand names but will be labeled with one or more of these terms, Biodegradable, Castile, or Organic.

Unlike many commercially produced soaps and detergents, which contain harsh chemicals, these soaps use natural ingredients. A favorite of mine is Castile soap. The name Castile is not a brand; rather it refers to the Castile region of Spain where the soap was originally produced. For centuries, Castile soap has been made from natural products and still maintains a reputation for quality. I use a liquid Castile soap for washing everything when camping; I save money, free up space in the car, and help the outdoors. Best of all, this soap does-it-all, it gets the family AND the dishes clean.

car-camping-tip-7Finally, being mindful about scents can keep animals away from your campsite. Many of the soaps (even Castile) can be scented with Fruits, Peppermint, Sage, and Lavender. While these scents are pleasant to humans, they can attract hungry animals. When buying any soap, for camping purposes, make sure it is unscented.

Remember, save time, money and the environment when camping and use one type of natural soap that can do-it-all. Look for soap that is labeled: Biodegradable, Castile or Organic. Castile is perfect for camping and can be used to wash everything. Choose unscented to lessen the chance of animal visitors.

Practical Tips to Help First-time Campers: Tip #6 Wash Dishes Easily and with No Mess

IMG_6540Meals cooked in the great outdoors are truly a delight; however, washing the dishes are often considered a chore. Washing dishes does not have to hard or time-consuming. Below are some quick and easy time-tested methods to help with washing dishes at the campsite.

Check the Facilities

Many campgrounds provide a central sink or designated wash area. If not, you will have to wash the dishes at your campsite. This is not as hard as it sounds, but it does require some added responsibility.

Personal Responsibility

You are responsible for providing a safe and clean camp for others in your group, as well as for other campers. If you have a water spigot close by, use it for gathering water, not for washing dishes. Also, keep the campground clean by disposing of any food scraps in the trash, not by burying or burning scraps in the fire pit, as it might attract unwanted visits from animals.

Family Time

A family of four can have their dishes, utensils, and cookware washed in ten to fifteen minutes. The process works like clockwork after the family has done this several times and members know their individual roles (washing, drying, getting water ready etc). Remember to have everyone help.

Equipment

You only need a few items:

  • Two dishpans, pots or buckets (In my family we prefer a dishpan and bucket)
  • Paper Towels
  • Drying Towels
  • Hot water
  • Soap

I suggest having a small dishpan (for washing), and a bucket (for rinsing or carrying the dishes to a designated sink). When these are not being used the two can easily sit inside each other and hold your towels and soap. As a bonus, this minimalist approach to equipment is easy on the wallet and reduces the amount of packing space needed in the vehicle.

Washing the Dishes in Seven Easy Steps

Step 1. Gather the washing pans while a 2-quart pan/pot of water is heating.
Step 2. Pre-wipe dishes, utensils, and pans with a paper towel to remove any food scraps. Add the soiled paper towels to your trash; do not burn them in the campfire. (This step keeps the wash water cleaner and prevents food residue from luring animals to your site).
car-camping-tip-6-step2
Step 3. In one dishpan, pour in just enough hot water to cover the bottom (about a half an inch to three-quarters of an inch deep). Add the soap. Adjust the water temperature by adding cold water.
car-camping-tip-6-step3
Step 4. Wash with a sponge, dishcloth, or brush.
car-camping-tip-6-step4
Step 5. In the second dishpan, or bucket, rinse the dish with warm or hot water.
car-camping-tip-6-step5
Step 6. Set the dishes on a clean towel to air dry, or dry them with a separate towel.
car-camping-tip-6-step6
Step 7. When the washing is finished, pour the gray water from the first dishpan into the second. Rinse the first dishpan. Dispose of the gray water.
car-camping-tip-6-step7

Disposing of Gray Water

If you can dispose of gray water at a central sink or specified area, do so. If this is not an option then carry your container of gray water away from campsites, streams, and neighbors, then broadcast the water (spread it over a wide area). Some guidebooks suggest straining the gray water to remove large food bits, but this is not really necessary if you effectively wiped the dishes with the paper towels early in the process and removed any food prior to washing.

Washing dishes at the campsite can be intimidating at first, but with some careful planning and some basic equipment, it can be thorough and completed quickly.

Next, how to choose the best soap.

Practical Tips to Help First-time Campers: Tip #5 Eat Well. Plan Your Meals

car-camping-tip-5aThe thought of cooking can be intimidating. Where does a person start?

It does not begin with buying food, rather it begins with a simple process for understanding how you will be camping, the methods you will use to prepare the food, and then deciding what to cook. Here are some suggestions to help with thinking about the process:

What is Your Method of Camping?

This sounds obvious, but campers frequently do not clarify their method of camping and bring way too much equipment. Will you be in an RV, a pop-up trailer, a cabin, a tent, or just sleeping under the stars? Clarifying this question will help you to identify your supplies. Once you know how you will be camping, you can identify the methods of cooking.

How Will Your Cook?

Narrow down your supplies further by clarifying the method(s) needed to cook your food. Here are four common methods of cooking. Depending on your experience and preferences you might use one or several combinations.

CAMP STOVE

Camp stoves have one to two burners and require a fuel canister. They are good for cooking with controlled and sustained heat. These stoves can fold down so they do not take up much room in your vehicle. Make sure to clean your stove after each use and give it a thorough cleaning after your trip.

HIKING STOVE

Hiking stoves are compact and use a small fuel bottle. These stoves are a favorite among backpackers and can be used for car camping. However, if you have a large family, a camp stove might serve your needs better.

CHARCOAL/GAS GRILL

Charcoal is easy to light, there is no wood to deal with and clean up is easy. If you use charcoal, do not cook over the smoke as some brands use harsh chemical starters, and you do not want these in your food. The coals should be gray/white hot before cooking. Gas grills are popular for a quick lighting ability, though can be cumbersome because of size and often require larger vehicles for transporting.

CAMPFIRE

The campfire is the most time-honored way to cook. Cooking over a fire is similar to cooking with a charcoal grill, but make sure the wood does not smoke on your food – unless you know the wood type and this is a flavor you want. If you purchase artificial fire logs, check to see if they contain chemicals; many pre-pressed logs are not suitable for cooking. When using a fire ring, that includes a grill, make sure the heat can burn off any old food and sterilize the metal.

Deciding What to Cook

car-camping-tip-5Now comes the difficult question, what to cook? Families who are camping for a night to two generally default to old favorites like hot dogs or hamburgers, but what if you are staying for multiple days? Here are several ideas:

MAKE A MEAL PLAN

A meal plan is a listing of what you want to eat during your camping trip. It is a good idea to really talk with your partner and kids about this plan so everyone has buy-in. Then use your meal plan as a guide to determine cooking methods and generate a shopping list. A meal plan can be developed easily – just refer to the “Food” tab on the checklist from Tip # 1 to help you get started.

PREPARE FOOD AT HOME

Pre-packaged food is appealing because it is easy to prepare and offers a reduced amount of cleanup. However, a less expensive alternative is to prepare some of the items at home and store them in a well-iced cooler. This can allow for healthier eating during the first several days of your camping trip. The key is to eat these perishable items early on your trip so they do not spoil.

Figuring out what to eat on a car camping trip can be intimidating. Minimize the guesswork by knowing how you will be camping and how you will be cooking your food. Make a meal plan and prepare some of the foods at home. These actions can save money, reduce the amount of equipment taken in the vehicle, and allow for healthier, better-tasting meals.

Next, a tip on how to wash all of those dishes.

Practical Tips to Help First-time Camper: Tip #4 Setup Your Campsite Like a Pro

car-camping-tip-4aDid you know that setting up camp is when most problems occur and tempers flare? Some simple steps can help.

A good rule of thumb, when you arrive at a campsite give yourself a breather, let the kids run around and unwind for twenty minutes. Use this time to identify where things are within your camp, and make some decisions about where and how to organize your supplies. Then include everyone with unloading the car and setting things up.

The goal is to create a situation where everyone has some personal ownership for the success of the camp. Involving everyone saves time so Mom and Dad do not get stuck with all the work (or get angry), and the kids know where the gear is located.

The Tent:

car-camping-tip-4

  • If your tent is new, set up the tent at least once before you go camping as a rehearsal. This action saves time and minimizes surprises.
  • Look for slopes and low spots on the ground. Slopes might not look like much from eye level but when you are trying to sleep a gentle slope can feel very steep. Place a ground cloth where you want your tent to be and lie down for a minute. How does the angle feel? Slopes sometimes go too low spots or depressions that can collect rain. Also, cold air moves to low spots. Is this where you want the tent to be?
  • A small pebble under the tent will feel like a boulder when you are trying to sleep. Do a thorough sweep of the ground where the tent will be placed and remove any twigs or small stones.
  • When placing your tent, check to see what is above you. Dead branches hanging above your tent can fall. If you can, move to a location where you are not directly under the branches.
  • Set your tent so the door is facing a direction that offers you privacy.
  • If your tent has tie-downs or other cordage consider where you might need to walk. You do not want to trip over the tie-downs at 3 o’clock in the morning on your way to the bathroom.
  • Bring a small hand-sized whiskbroom for cleaning out dirt and leaves that will be tracked inside your tent.
  • Keep the presence of dirt down with a small rug or mat outside the door of the tent; this also creates a place for removing and putting on shoes.

The Table:

  • Use a table covering; it is not just for appearance, it is also for sanitation and helps to keep food scraps off the ground that might attract unwanted visitors.
  • Does the table allow you to set up a stove at one end?
  • Can you have safe access to your food and equipment?
  • Look at trees surrounding the table. Can you use a tarp, rope or bungees to rig a rain/sunshade? Or, if you have a screen room, does the placement of the table allow you to maneuver and be at a safe distance from the fire?

Food Storage:

  • When you check in at the park, inquire about the campground’s food storage policy. Has the policy changed since you made your reservations? Are there any known problem animals in the area? Can the food be kept in the car, or must it be stored in an onsite food storage locker?
  • Food storage lockers can be made of wood or metal. Most wooden lockers are being transitioned to metal because of a longer lifespan. The downside of a metal locker is that they often can become oven-like when subjected to direct sun for long periods of time. Look for where the sun might be in relationship to your food locker at different times of the day. If the locker is in the shade in the morning will it also be in the shade in the afternoon?

Handy to Have Items:

  • Bring a large container to carry water, but make sure one person can carry it when full. You will want to have the water close by, at your table for drinking, cooking, washing dishes, etc.
  • Rather than one big trash bag, bring an extra quantity of small trash bags and toss the trash after each meal. Reduce the amount of trash by using the recycling bins at the park.
  • Most importantly, have the entire family (or those within a tent) agree to the location(s) of the critical items, like car keys, the first aid kit, and flashlights.

When setting up the campsite have everyone in your family help. It helps to lessen problems and ensures that everyone shares in responsibilities.

Next, let’s talk about food!

Practical Tips to Help First-time Campers: Tip #3 How to Make the Best of Campground Bathrooms and Showers

The real (unspoken) reasons people are afraid of camping is not because of weather, mosquitoes or animals; it is because they are fearful of having to use showers or toilets that might be unclean, or not allow for enough privacy. They often imagine ancient outhouses like the one in the photo*.

car-camping-tip-3Most showers and toilets at campgrounds are well maintained and allow for privacy. Rarely, if ever, will you encounter a 100-year old outhouse. That said, a little planning goes a long way when using campground bathrooms and showers. Here is a quick overview of the facilities you might encounter at a typical national/state park campground, and some suggestions on how to stay clean and maintain your modesty.

Showers:

Shower facilities are generally located at a central location. The showers can offer cold or hot water; having access to hot water usually requires a small fee and your time will be measured in minutes. A timer box will be located in the shower and you might need quarters or tokens. Most showers are cubicles and include a privacy curtain. As with any public shower, wear sandals or shower shoes to provide a barrier between your feet and the floor. Bring your own towel, soap, and shampoo. As a backup, have a personal washcloth and soap packed with your equipment so you can take a quick sponge bath in case the showers are out of order.

Electricity:

Many campgrounds will have lights in the showers and bathrooms. Electrical outlets are generally available at such locations. If you are staying in an older campground, or further away from the main facility, be prepared for basic lighting and no electrical outlets. If you are staying within a remote area you may not have any electricity.

Toilets:

Toilet facilities can vary. Here are some variations that you might find.

RUSTIC

A rustic toilet is essentially an old-time wooden outhouse. This type of structure is rare in campgrounds today because of modern sanitation and accessibility laws, but in remote places, some can still exist. If you need to use a rustic facility remember that they may not be serviced on a regular schedule so bring your own toilet paper and hand sanitizer.

PORTA POTTIES

Porta Potties derive their name from being portable. All waste is self-contained within these structures and chemicals are used to diminish odors. The waste is pumped out when serviced. They are usually owned by third-party businesses that have contracted with the campground to provide and service the units. Porta Potties are generally serviced on a set schedule, but if they need cleaning or are out of supplies they can remain so until the next scheduled servicing. Best to have some backup supplies in your daypack or car. Always have some extra toilet paper and hand sanitizer available.

VAULT TOILETS

Vault toilets are simple cement or fiberglass structures that are built over a large waste pit, these are common in National Forest campgrounds. A non-flush toilet is inside the structure. Vault toilets are often well ventilated but can have a strong odor if used by a lot of people. Campground staff generally maintains these facilities on a daily or multi-day basis. Keep extra toilet paper in the daypack/car and have hand sanitizer handy.

FLUSHERS

Flushers are modern toilets with running water. These facilities are frequently located near prominent Visitor Centers. Flushers are usually maintained several times a day by maintenance staff. These facilities can include sink, soap and paper towels. As a backup, it is good to have some emergency toilet paper in the car.

Being cautious about public bathrooms and showers is always a good thing, but don’t let fear keep you from enjoying your time camping. Avoid the surprise of arriving at a campground and discovering the bath or shower facilities are not up to your expectations. Do some research about the campground and if needed, call the park ranger to ask questions.

*Photo: This is an actual outhouse located within a California State Park, but it is not for public use – at least not in the past hundred years or so. This photo was taken at Bodie State Historic Park, a former mining town and now a ghost town. The park is located along the California and Nevada border.